
Directory Opus is an alternative software for Windows Explorer. Directory Opus has a range of tools and customization options that make it far more versatile and powerful than Windows Explorer.
Disclaimer: Note that this is not an advertorial for Directory Opus. I don’t make money or have any ads on this site.
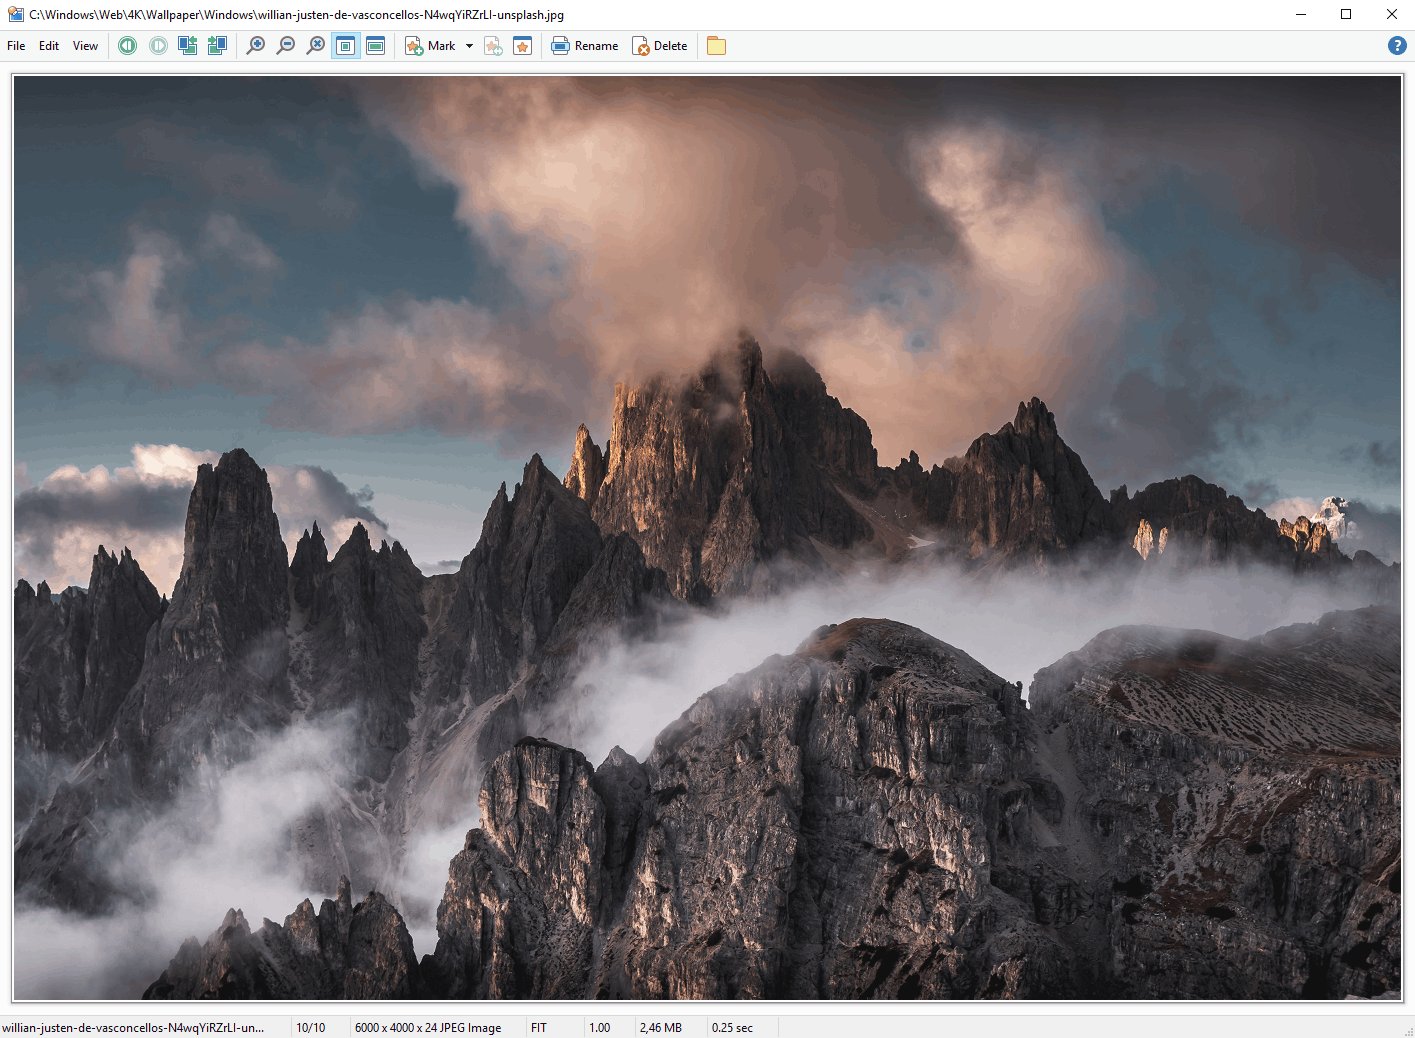
What is “The viewer”?
“The viewer” is Directory Opus’ internal previewer for all kinds of files, but most commonly image files. You can compare it to the “Windows photo viewer” or MacOS’s “Preview“.
There is a reason the “viewer” is called the viewer in Directory Opus. It is not just an image viewer. It is basically an “everything viewer”. It can preview pretty much all popular file types out there. Word files, excel, mp4, mp3, jpg, RAW, ARW, txt, HTML to mention a few.
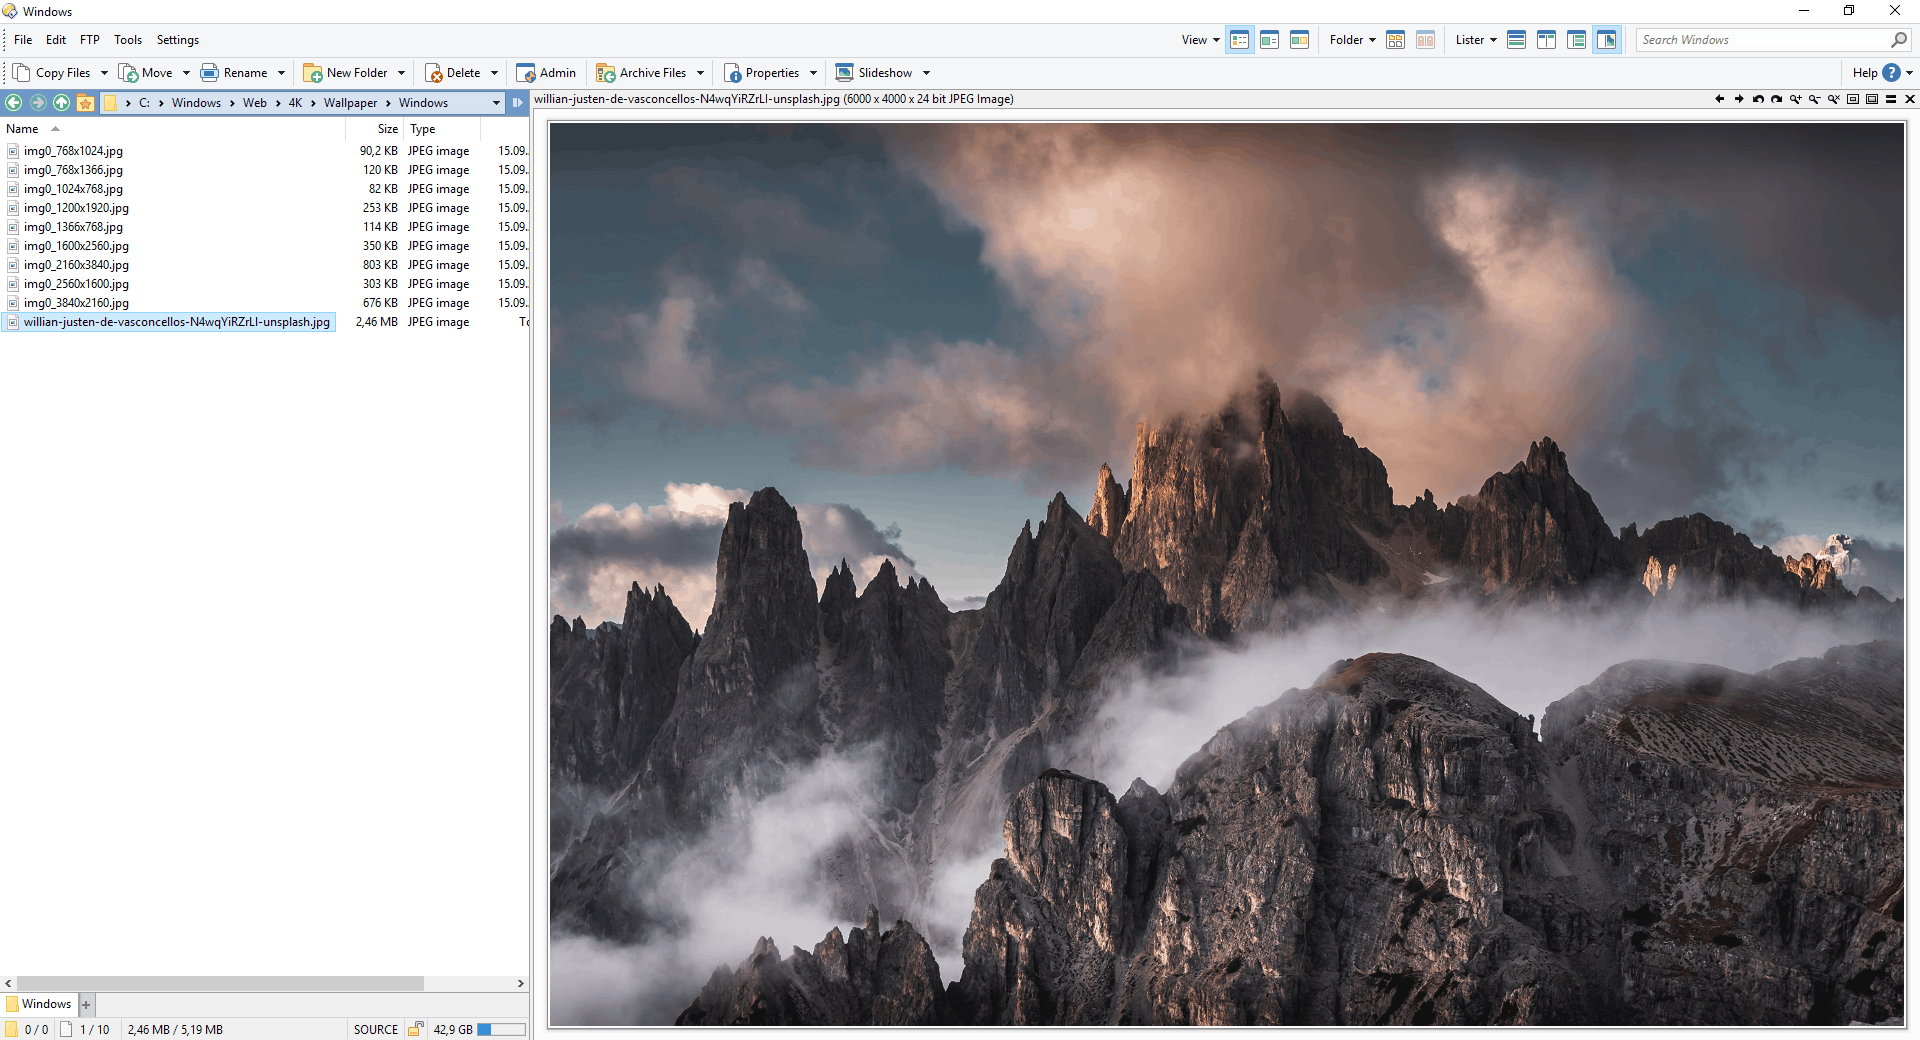
The “viewer” and the “view pane” are basically the same, except that the “viewer pane” allows you to view the viewer inside a Directory Opus window.
Nevertheless, there are some default settings that come with the viewer that either make no sense or could be adjusted for a more “modern” workflow, in my opinion. Let’s have a look.
Fit image to the viewer window
When we open a picture we prefer to see the whole image, right? Not just a part of it. Even if the picture dimensions are larger than the screen, it is all contained within the screen area.
Oh, by the way, if you like that black interface – Directory Opus can have that too if you want.
Directory Opus will not resize the image to fit the window by default, so a large picture will look like this 😟:
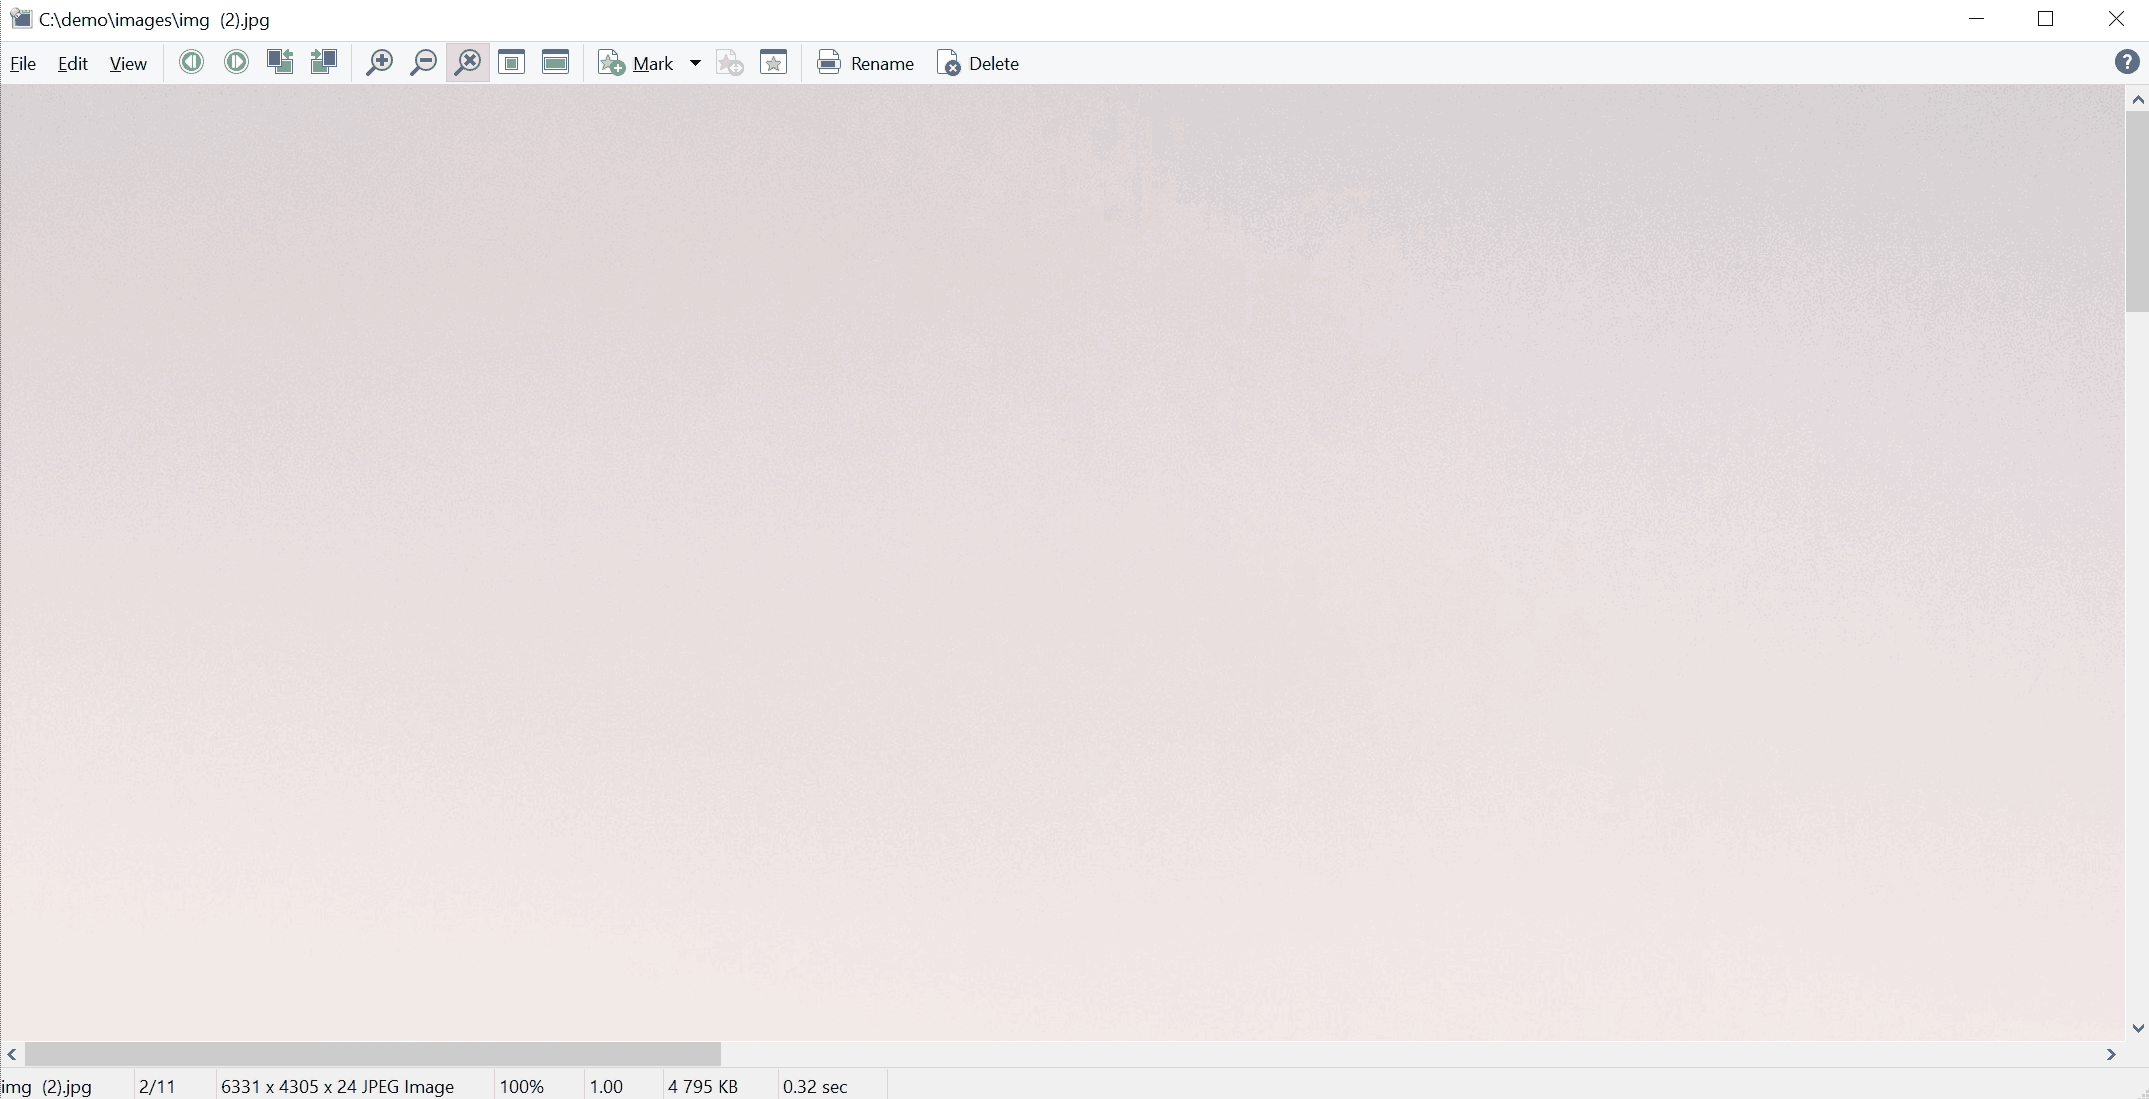
But it can be fixed! 😀
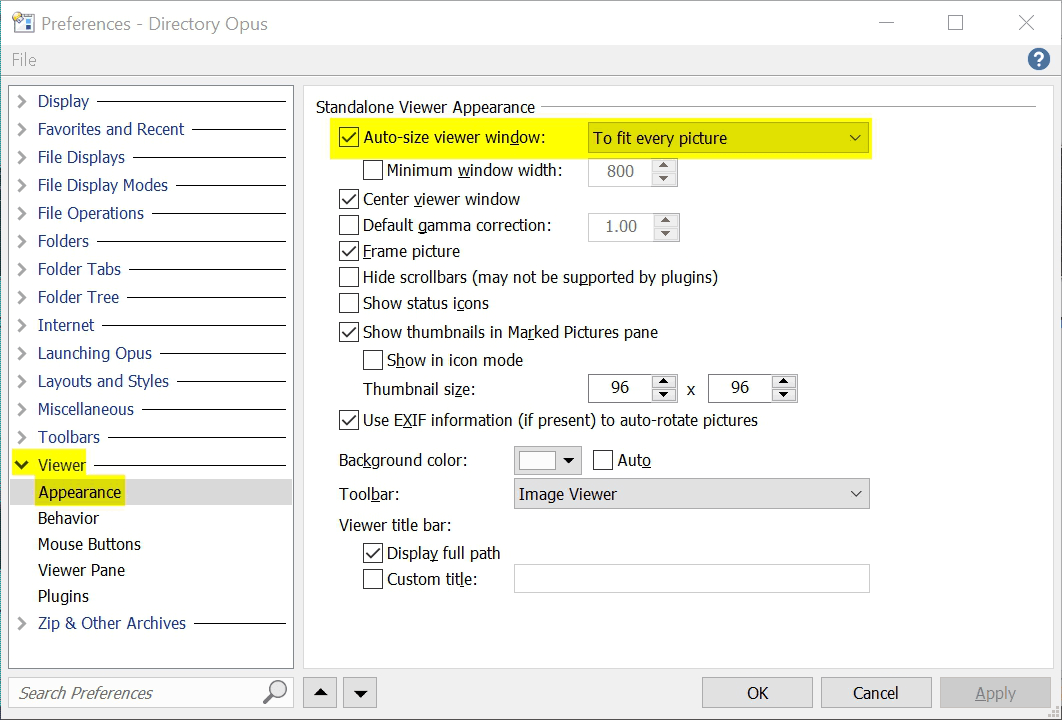
Go to Preferences > Appearance > and set “auto-size viewer window” to “fit every picture“.
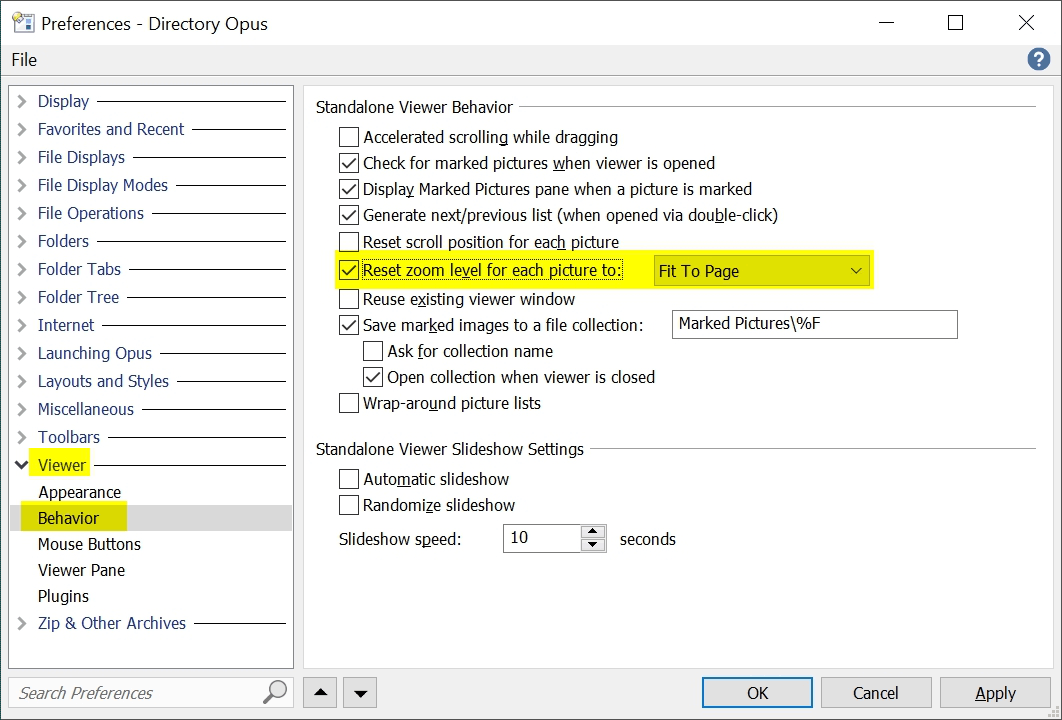
Also go to Preferences > Viewer – Behavior > Reset Zoom level for each picture to Fit To Page. This will do the same for the preview (internal) viewer.
This will tell Directory Opus one of two things:
- If the picture is smaller than your screen width and height, the viewer will adjust its frame to the picture dimensions.
- Or if the picture is larger than your screen width and height Directory Opus will constrain the picture to the viewer frame, so you can see the whole picture.
That’s it!
Open pictures in the same window
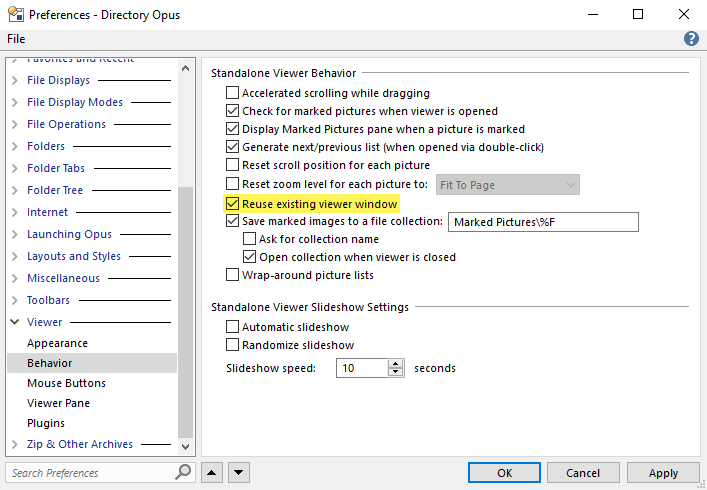
You can set the image viewer to use the same window every time you open a new image instead of opening multiple windows.
- Preferences -> Viewer -> Behaviour
- Turn on “Reuse existing viewer window”
Use the arrow keys to go to the next/previous picture
In most image viewers today you can use the right and left arrow keys to go to the next or previous image if you have multiple photos.
In Directory Opus, however, those keys are instead spacebar and backspace.
This is only confusing and recalcitrant. So how can we set it back to the good old arrow keys?
- Go to Settings menu -> Customize toolbars
- Chose the Key tab
- Scroll to the “Image viewer (keys)” section
- Double click on previous picture or next picture
- Click in the “Hotkey” and remove the assigned key
- Press the key combo you want and hit OK
- Do the same for both the previous and next picture.
Here is an animation showing the process:
Note that you can have multiple key combinations for one command. That is; you can have both the space bar and the right arrow key as trigger for the next picture if you want. It might be wise to stick to one key combo though…
Syncing image viewer and file selection
Leo, from the Directory Opus team, has made a script that makes the image viewer follow selected files. Here is a video of it in action.
You can download the script here: https://resource.dopus.com/t/viewer-select-make-file-display-track-standalone-viewer/23320
Save the following code as a .js file and import it to Directory Opus:
- Open Settings
- Go to Preferences -> Toolbars -> Scripts.
- Drag the
.jsfile to the list of scripts and click OK.
Rotating images
By default, the Dirctory Opus viewer will not rotate images permanently, only temporarily in the viewer.
If you want to rotate images permanently you will have to add these buttons to the viewer.
- Copy the following XML code.
- Set Directory Opus to customize mode.
- Right-click somewhere in the viewer toolbar and click paste to paste the rotate button.
- Do the same for the other button.
- You can right-click and delete the built-in old rotate buttons.
Rotate right:
<?xml version="1.0"?>
<button backcol="none" display="icon" label_pos="right" textcol="none">
	<label>Rotate Left</label>
	<tip>Rotate selected images 90 degrees to the left</tip>
	<icon1>#rotateleft</icon1>
	<function type="normal">
		<instruction>Image ROTATE=270 HERE REPLACE</instruction>
		<instruction>Show VIEWERCMD=refresh</instruction>
		<instruction>@nodeselect</instruction>
	</function>
</button>
Rotate left:
<?xml version="1.0"?>
<button backcol="none" display="icon" label_pos="right" textcol="none">
<label>Rotate Right</label>
<tip>Rotate selected images 90 degrees to the right</tip>
<icon1>#rotateright</icon1>
<function type="normal">
<instruction>Image ROTATE=90 HERE REPLACE</instruction>
<instruction>Show VIEWERCMD=refresh</instruction>
<instruction>@nodeselect</instruction>
</function>
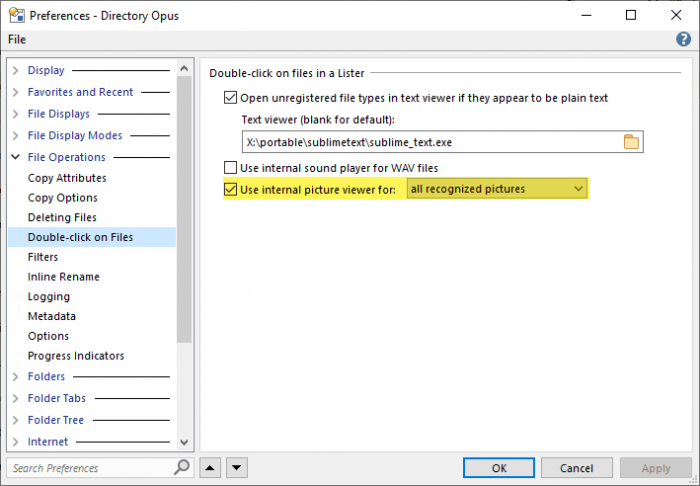
</button>Set the default picture viewer in Directory Opus
Click on Preferences → File Operations → Double-click on Files → check “Use internal Picture viewer” for “all recognized pictures”.
Sources
https://resource.dopus.com/t/viewer-select-make-file-display-track-standalone-viewer/23320
I do trust all of the ideas you’ve introduced
for your post. They’re really convincing and will
definitely work. Nonetheless, the posts are very short for newbies.
May you please prolong them a bit from next time? Thanks for the post.