
This is an explanation of all the steps I had to go through to make a modded Wii U in November 2018. I am not sure if it still applies, but I assume that if you have the same firmware, it should work.
Basically all the info here is from wiiu.hacks.guide. The documentation can also be found on Github or as an archive per 2018.11.25.
The type of Wii U used here is:
- Wii U with firmware 5.5.3 E.
- WUP-101(03) 32 GB version
Reset your Wii U
This whole process could take a couple of hours so make sure you have the time and patience. 🕓…
Start with resetting your Wii U to factory settings. Note that you will lose all data on the Wii U if you do this.
- Turn on your Wii U
- Go to “System Settings”
- Go to the right until you see “Delete All Content and Settings”.
- Press the icon, click next, and “Delete everything”.
- After the formatting is complete the Wii U will shut down. Turn it back on and go through the whole “first-time-setup”. While you are at it, it is a good idea to logon with a Nintendo account, because we will need to download a game from the Wii U Store later on.
- You should connect to the WiFi, but try not to update the console if you are asked.
Prepare the SD card and download files
This information is from https://wiiu.hacks.guide/get-started
Find a large SD card of at least 8 GB. Format the SD card as FAT32 and make sure it is in MBR (Master Boot Record) format. If the SD card is large, say 128 GB Windows will not format it as FAT32, but you can use the “Fat 32 Format” software tool to format it.
Download the following files:
- config.txt
- config.ini
- The latest release of Homebrew App Store
- The latest release of WUP Installer GX2
- The latest release of disc2app
- The latest release of hid_to_vpad
- The latest release of Mocha CFW
- The latest release of savemii_mod
- The latest release of the Homebrew Launcher Channel (the channel
.zipfile) - A previous release (v1.3) of the Homebrew Launcher (the launcher
.zipfile) - The latest release of Wii U NAND Dumper
- The latest release of Haxchi and CBHC (both
.zipfiles) - The latest release of NNU-Patcher
Here is a collection of all of these files from archived 2018.11.24.
Copy the required files to the SD card
This information is from: https://wiiu.hacks.guide/get-started
1. Power off your device
2. Insert your SD card into your computer
3. Create a folder named wiiu on the root of your SD card
4. Create a folder named install on the root of your SD card
5. Copy the apps folder from the Homebrew App Store .zip to the /wiiu/ folder on your SD card
6. Copy the contents of the Homebrew Launcher (v1.3) .zip to the root of your SD card
7. Copy the contents of the Haxchi .zip to the root of your SD card
8. Copy the contents of the CBHC .zip to the root of your SD card
9. Copy config.txt to the /haxchi/ folder on your SD card (overwrite the existing config.txt file)
10. Create a folder named hbc in the /install/ folder on your SD card
11. Copy the contents of the Homebrew Launcher Channel .zip to the /install/hbc/ folder on your SD card
12. Copy the savemii_mod folder from the savemii_mod .zip to the /wiiu/apps/ folder on your SD card
13. Copy the contents of the WUP Installer GX2 .zip to the root of your SD card
14. Copy the contents of the disc2app .zip to the root of your SD card
15. Copy the contents of the hid_to_vpad .zip to the root of your SD card
16. Copy the contents of the NNU-Patcher .zip to the root of your SD card
17. Copy the contents of the Wii U NAND Dumper .zip to the root of your SD card
18. Copy the contents of the Mocha CFW .zip to the root of your SD card
19. Copy config.ini to the /wiiu/apps/mocha/ folder on your SD card
20. Reinsert your SD card into your device
21. Power on your device
In some of the steps, you will have to overwrite some of the files you just copied which may seem a little strange. Do not worry about that though you are doing it correctly.
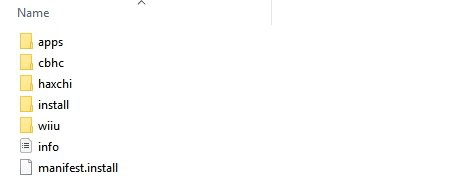
Here is a backup of what the SD card file structure should look like: SD card backup…
Now that the SD card is ready we have to prepare the Wii U.
Install a compatible DS Virtual Console game
Purchase a very cheap exploitable DS Virtual Console game to enable launch of your “Custom Firmware” automatically at boot.
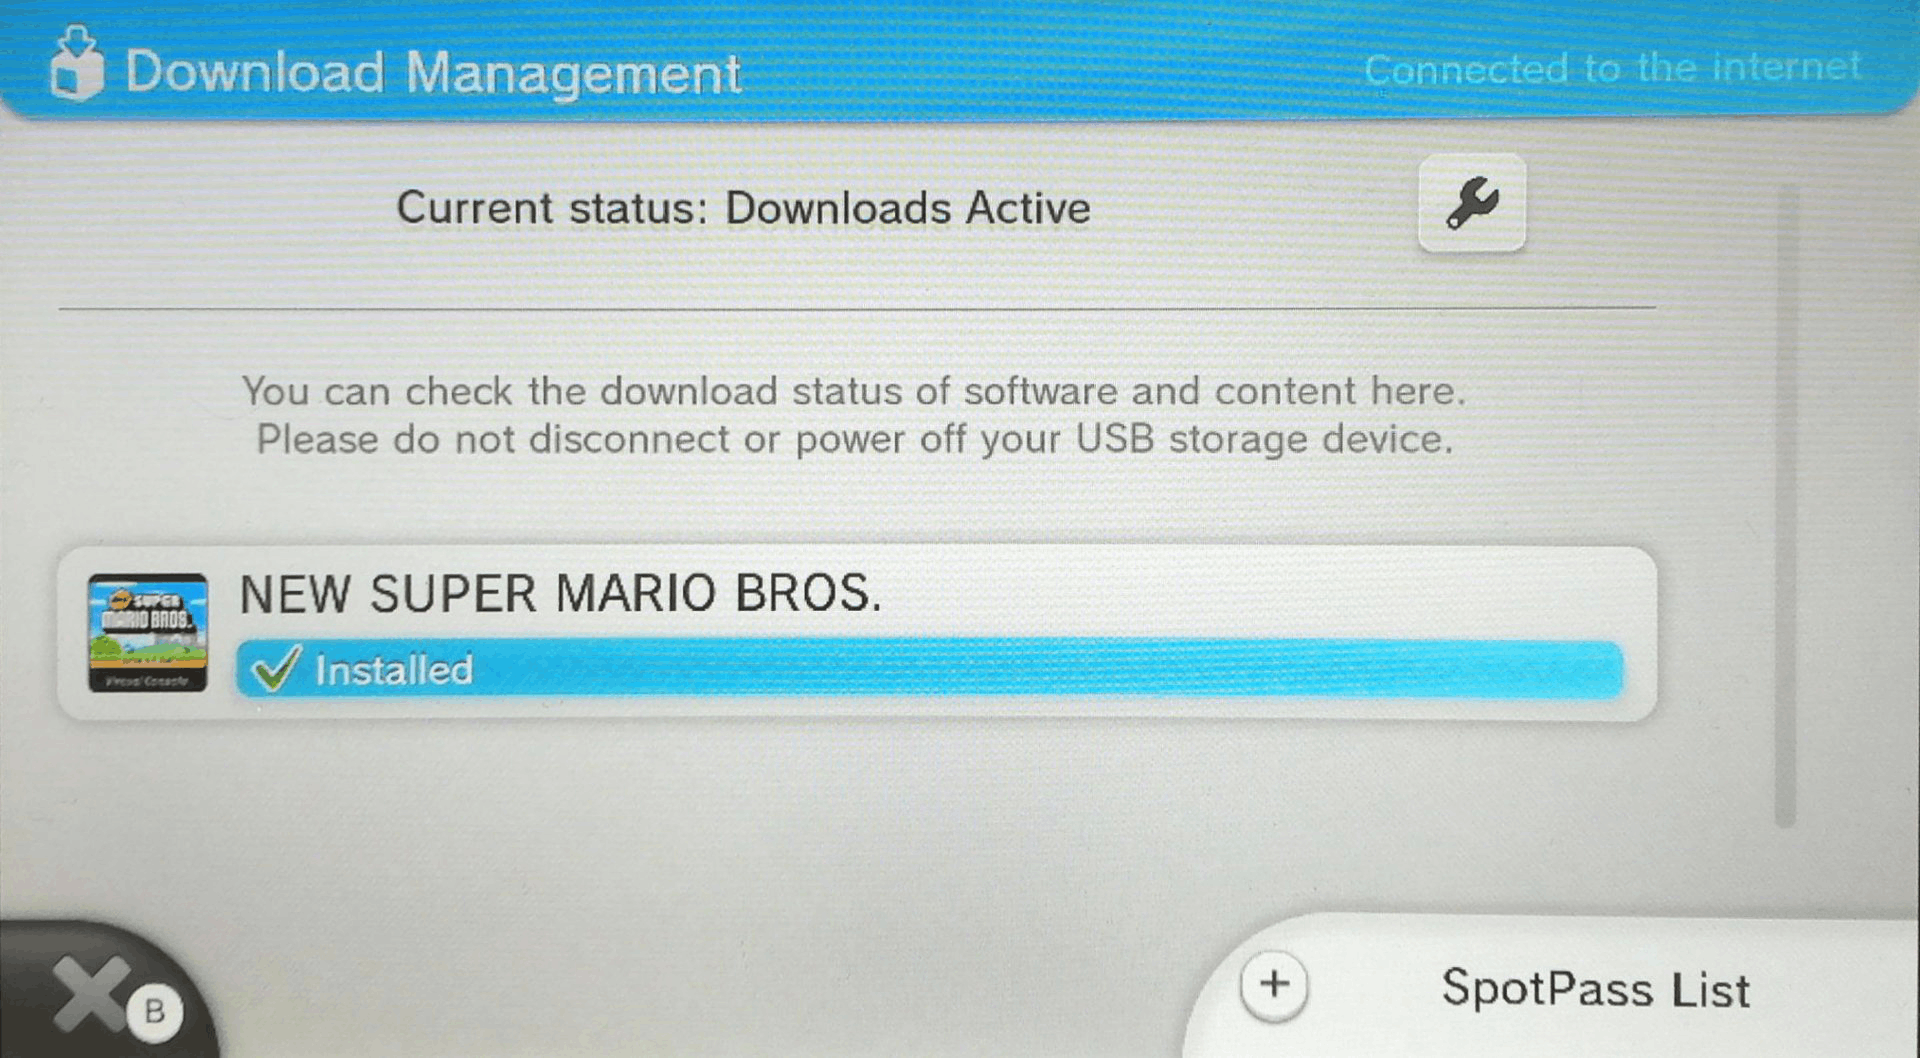
On the Wii U go to the Nintendo eShop and purchase and install one of the following games. It does not matter which one though. You should probably just take the cheapest.
- Animal Crossing: Wild World
- Big Brain Academy
- Brain Age
- DK: Jungle Climber
- Dr. Kawashima’s Brain Training
- Kirby: Canvas Curse
- Kirby: Mass Attack
- Kirby: Squeak Squad / Kirby: Mouse Attack
- Legend of Zelda: Phantom Hourglass
- Legend of Zelda: Spirit Tracks
- Mario & Luigi: Partners in Time
- Mario Kart DS
- New Super Mario Bros.
- Pokemon Mystery Dungeon: Explorers of the Sky
- Pokemon Ranger
- Pokemon Ranger: Guardian Signs
- Pokemon Ranger: Shadows of Almia
- Starfox Command
- Super Mario 64 DS
- Wario: Master of Disguise
- WarioWare: Touched
- Yoshi’s Island DS
- Yoshi’s Touch & Go
Installing the Homebrew Launcher
The Homebrew Launcher is a homebrew application that lists and allows the launching of other homebrew applications from the SD card. We launch this using the Wii U’s built-in browser, so your Wii U will need to be able to access the internet.
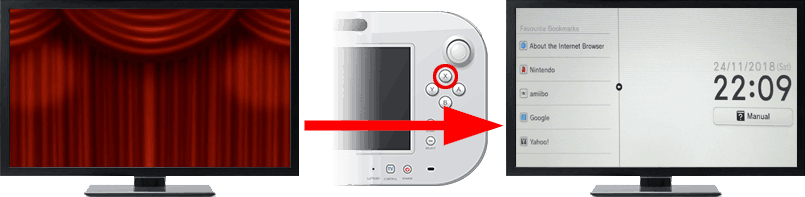
1. Open the Wii U Internet Browser
2. Hit the X-button on the gamepad to OPEN the “Wii U curtains”
3. Go to usploit.hacks.guide
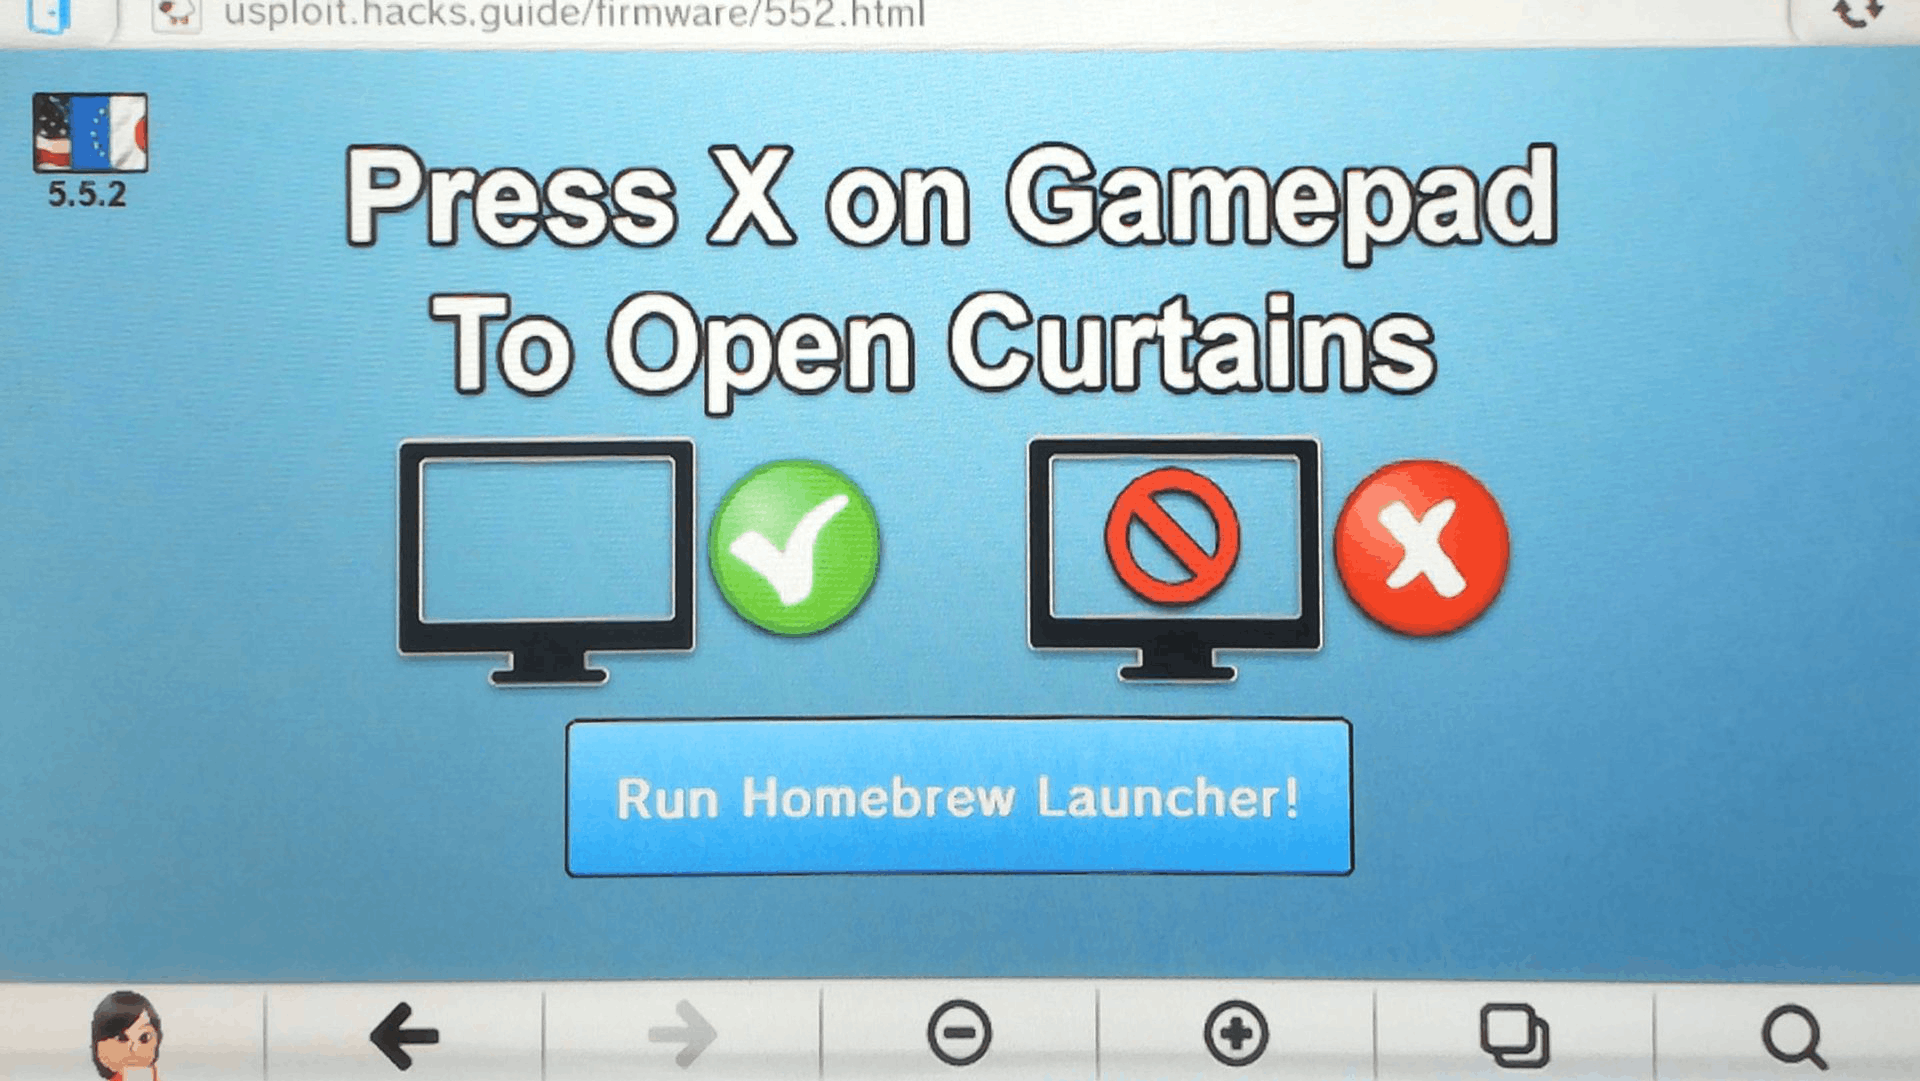
Either the browser will freeze (with a semi-opaque white screen) or it will launch the Homebrew Launcher immediately.
If it freezes power cycle the Wii U. Go to the Internet Browser -> Settings -> Reset Save Data -> Reset. Open the Internet browser again and repeat the process until it launches into Homebrew Launcher. It usually takes a couple of times (for me it was about 5 times) until it works so just be patient.
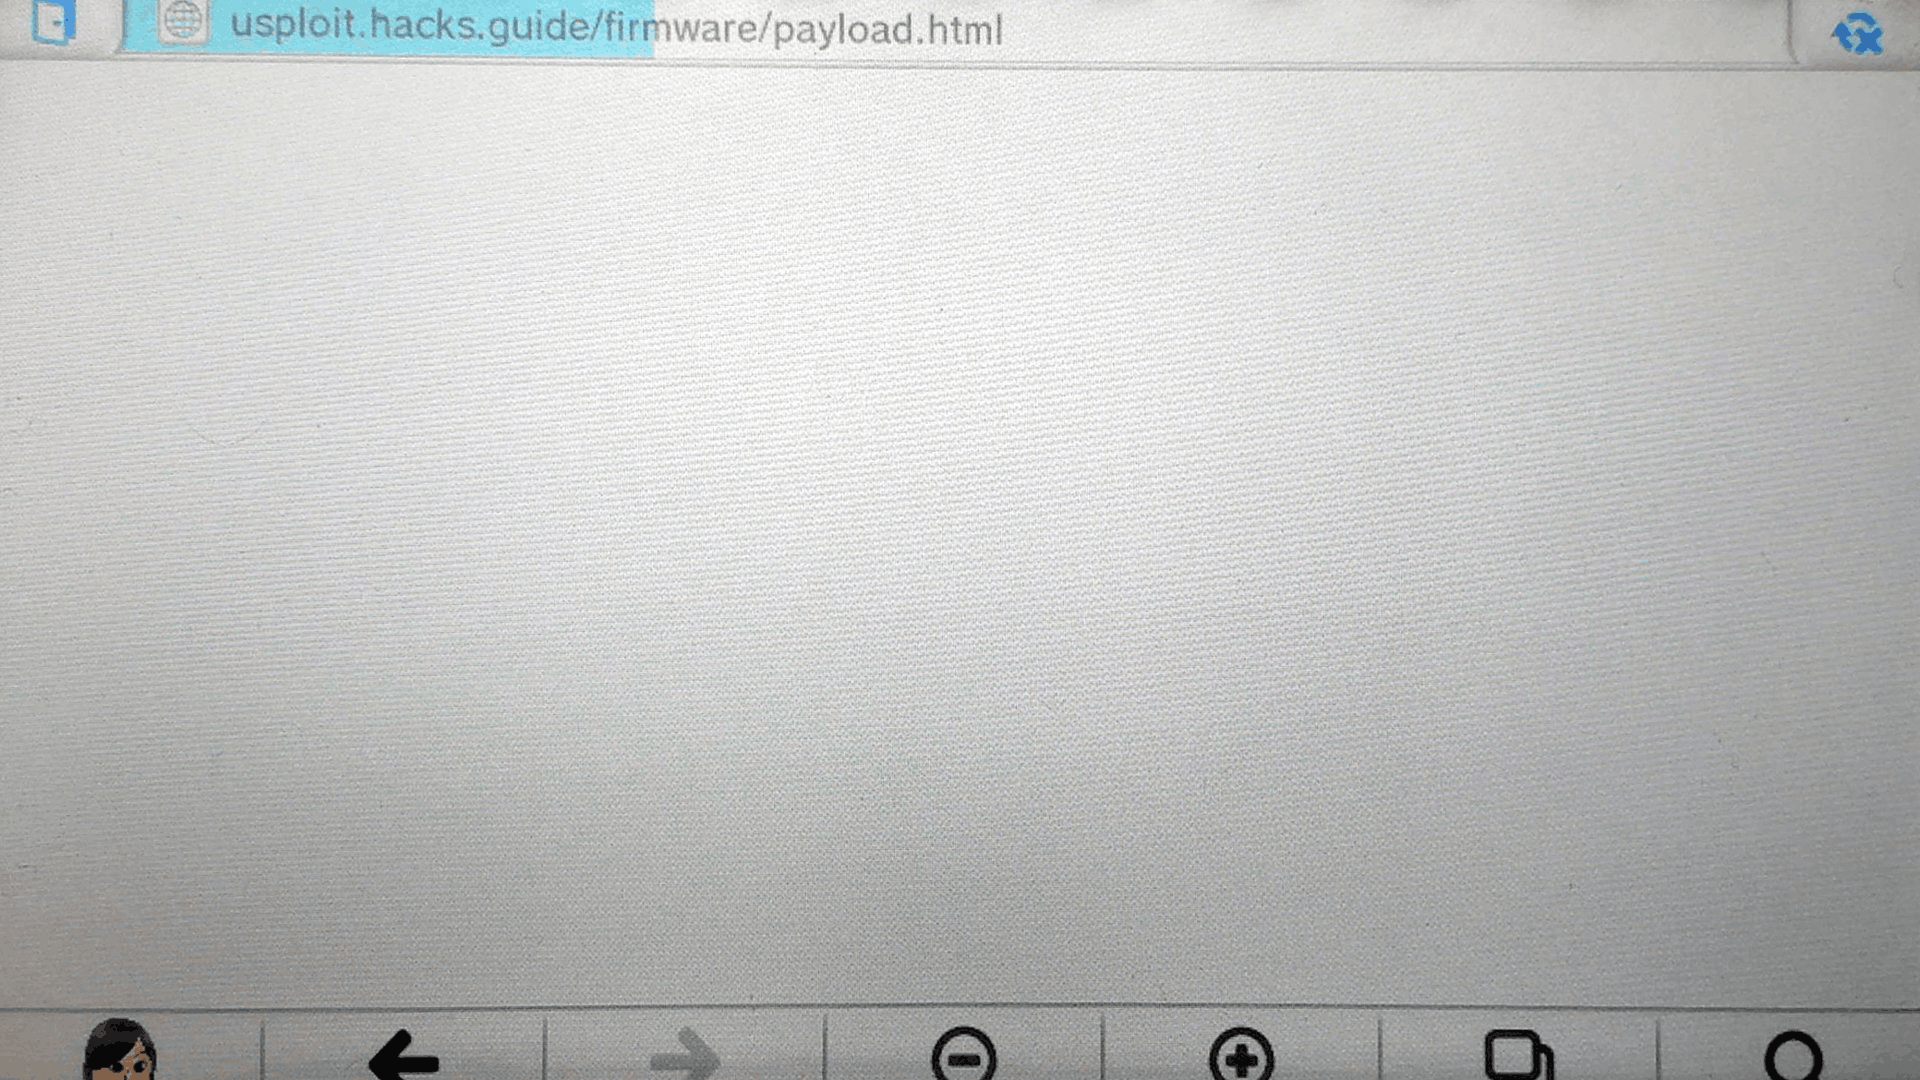
If/when it loads into “Homebrew Launcher” you are good to proceed to the next step. It should look something like this:
Installing Haxchi to enable custom firmware in Wii U
This will allow unsigned titles (such as the Homebrew Launcher) to be launched directly from the system menu.
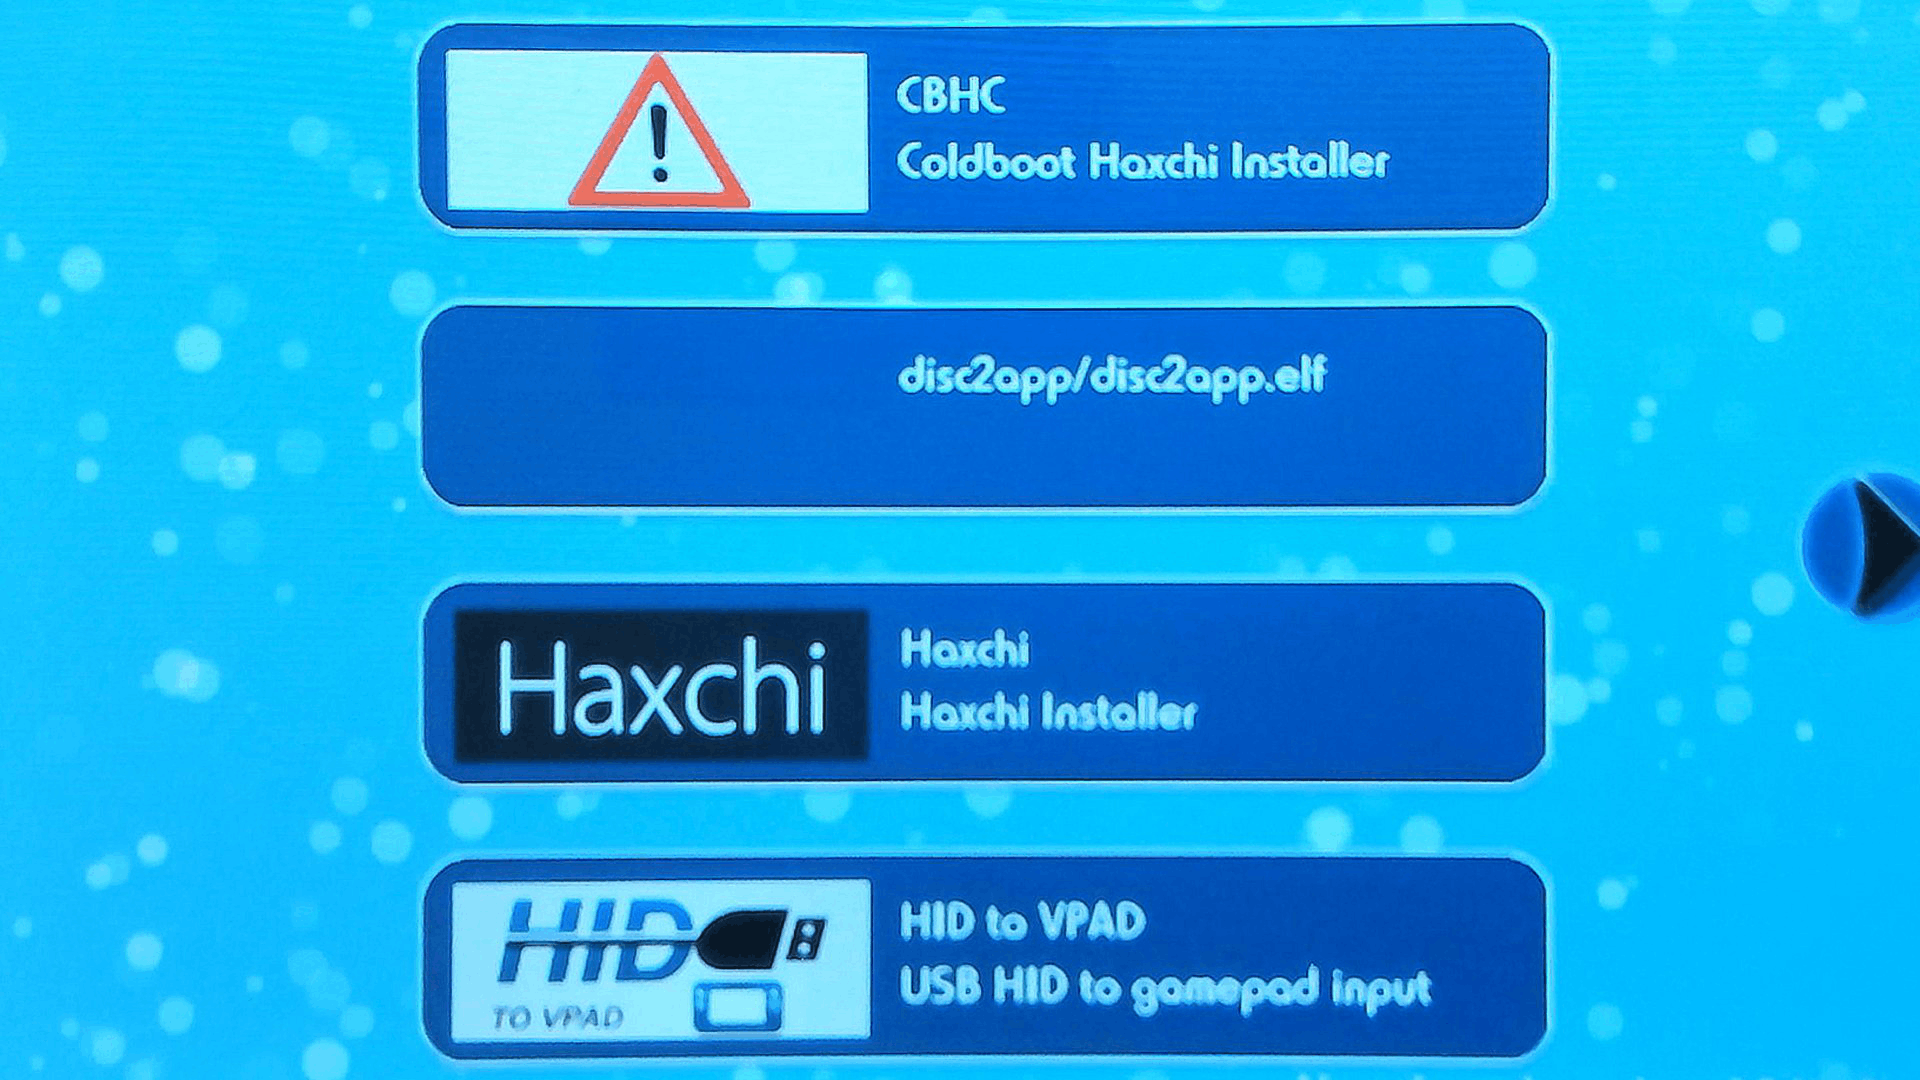
In the Homebrew Launcher run the “Haxchi Installer”. You will then see:

Hit the A-button and then the A-button again to install. The Wii U will then go reboot. Now you should see the Haxchi icon in the Wii U main menu.
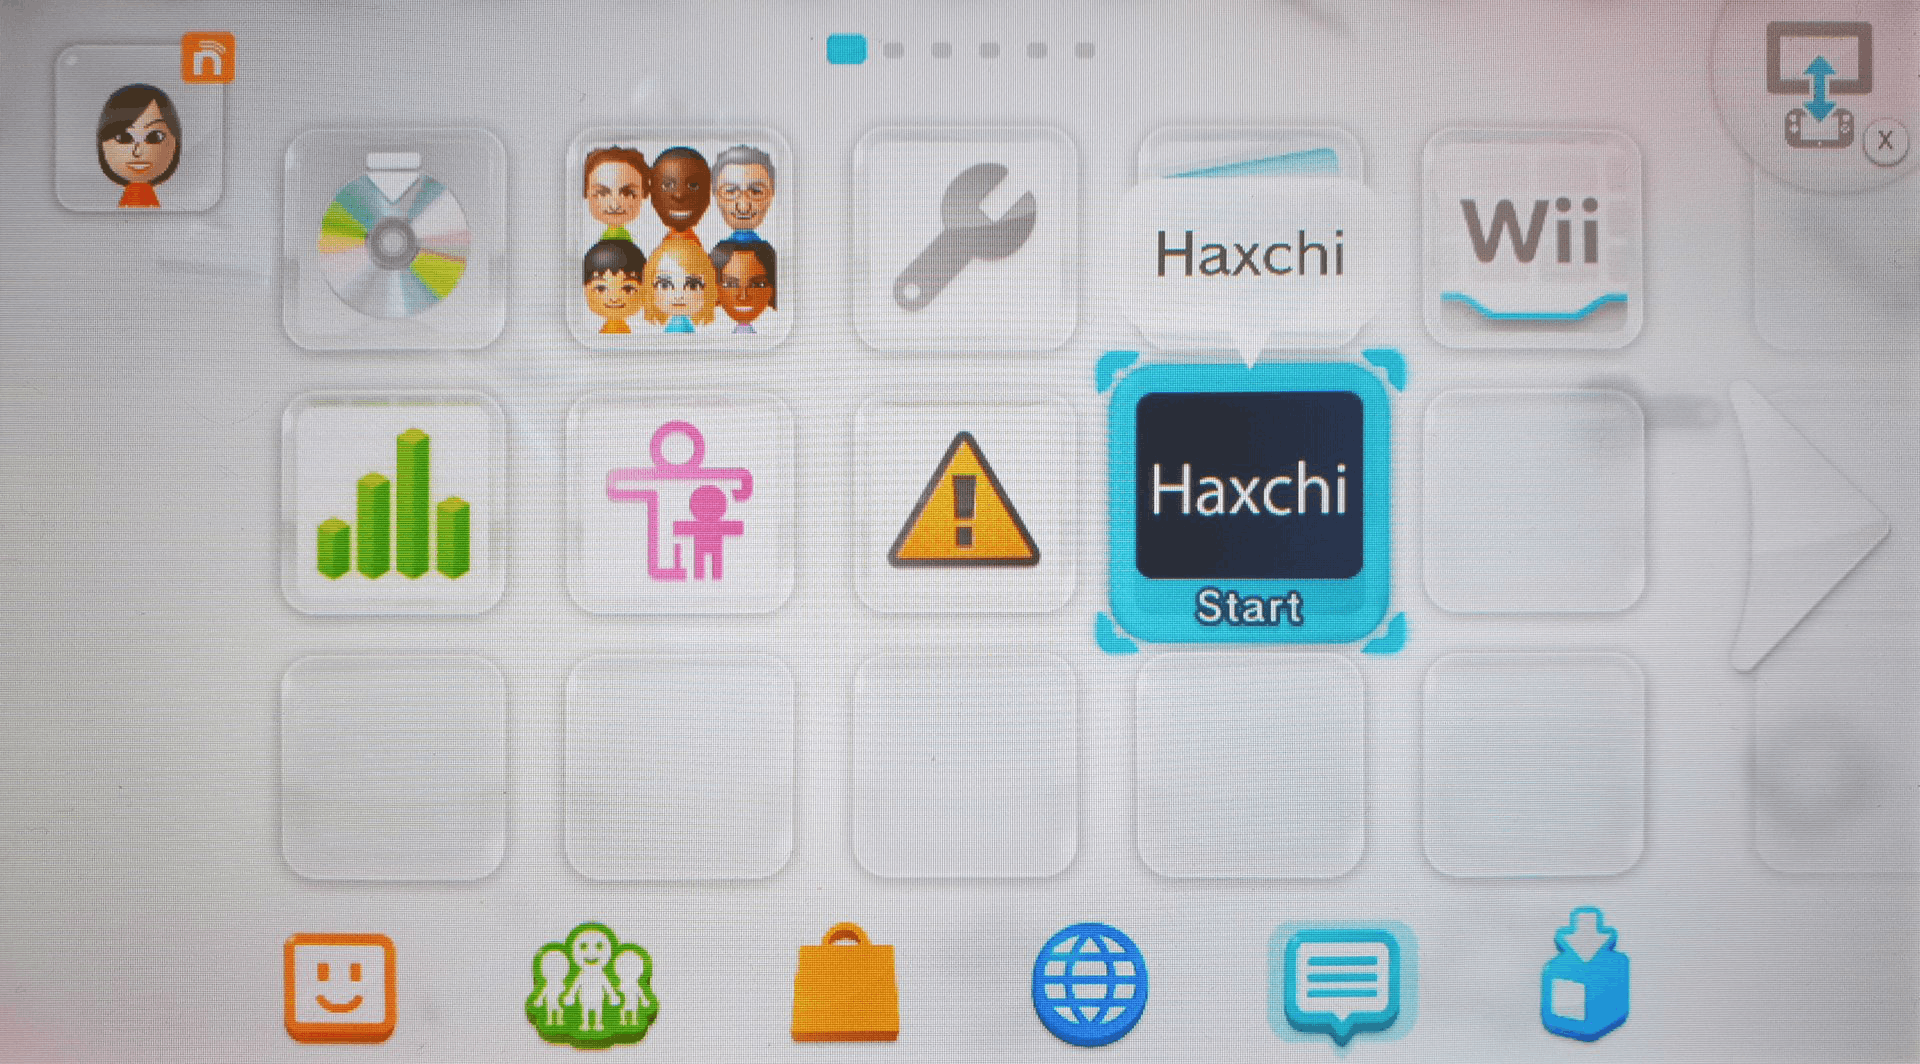
You can now do two things with the icon. You can either just click it to reboot into custom firmware. That means enable custom ROM in the Wii U… or you can hold the A-button while pressing the icon which will start the “Homebrew Launcher”.
In this case, we will launch Haxchi (without holding any button). This will enable custom firmware. Basically the Haxchi logo will show for a couple of seconds, then boot into custom firmware. Note that once you are in the custom firmware there is really no way to tell unless you remember that you actually did this.
Now, again we will run the Haxchi icon, but this time we will press the icon while holding (A) to launch the Homebrew Launcher.
Note that you must launch the “DS virtual console game” (in this case Haxchi) every time you reboot in order to enter custom firmware. This will take us back to the Homebrew Launcher menu which you probably now recognize from earlier on.
Install “WUP Installer GX2” in the Homebrew Launcher
If you continue from the previous step and you are in the Homebrew Launcher launch “WUP Installer GX2”. Select HBC (Homebrew channel). Press “Install”, then press “Yes” to confirm. Select “NAND” as the destination.
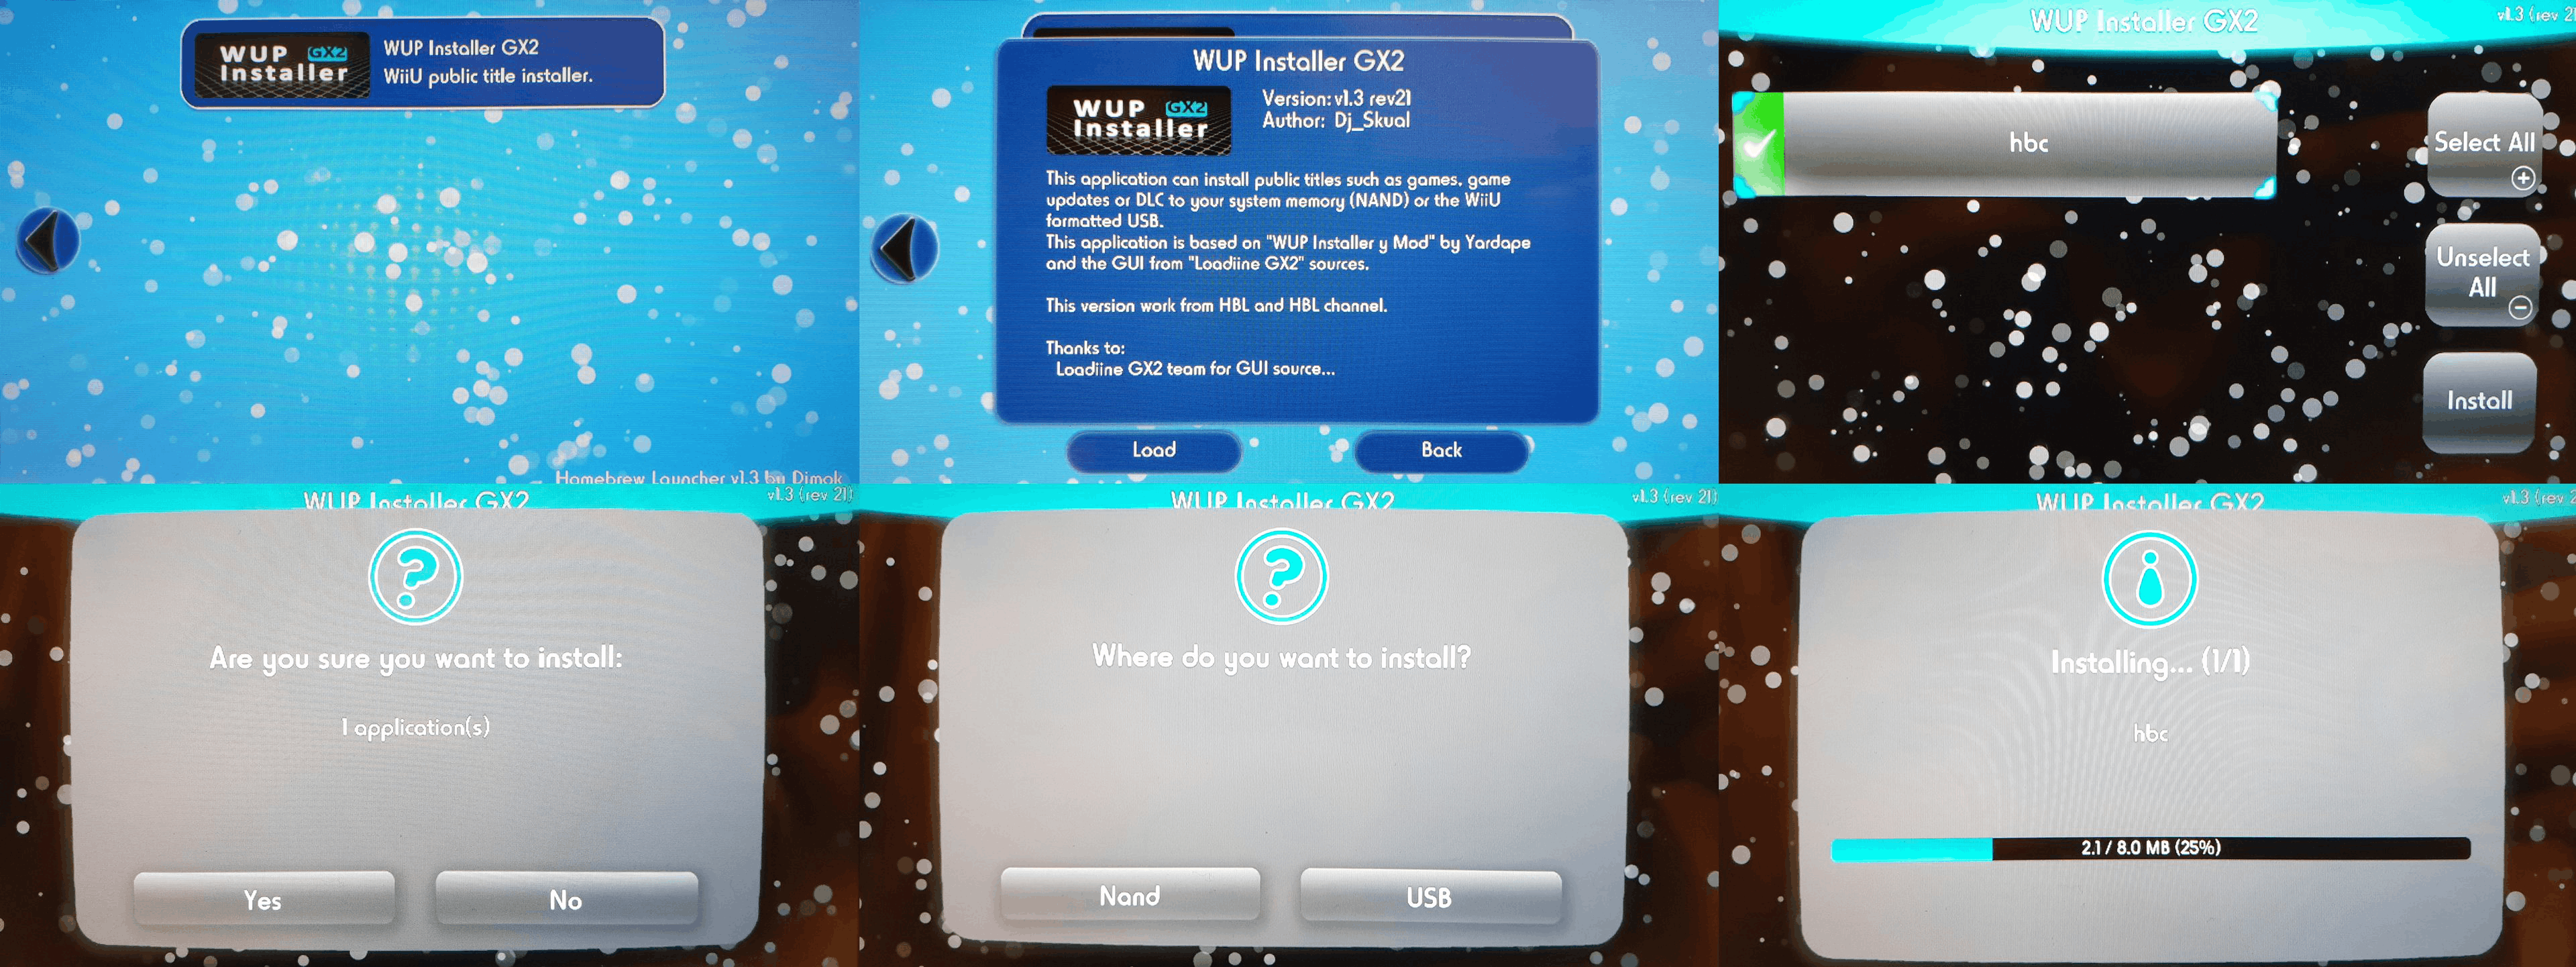
Press (Home), then close the software to exit the installer once it has completed installing.
You can now launch the Homebrew Launcher on custom firmware just by launching the Homebrew Channel.
Block system updates
Go to the “System Settings”, then “Internet”, then “Connect to the Internet” then press (X) to display your current network connections.
For each of your connections (and all future connections), do the following:
- Select the connection
- Select “Change Settings”
- Move to the second list and choose “DNS”
- Set the DNS to “Don’t Auto-Obtain”
- Set the DNS server IPs to the following servers
168.235.092.108081.004.127.020- Select “Confirm”, then press (B) to save
- These servers will block your device from being updated
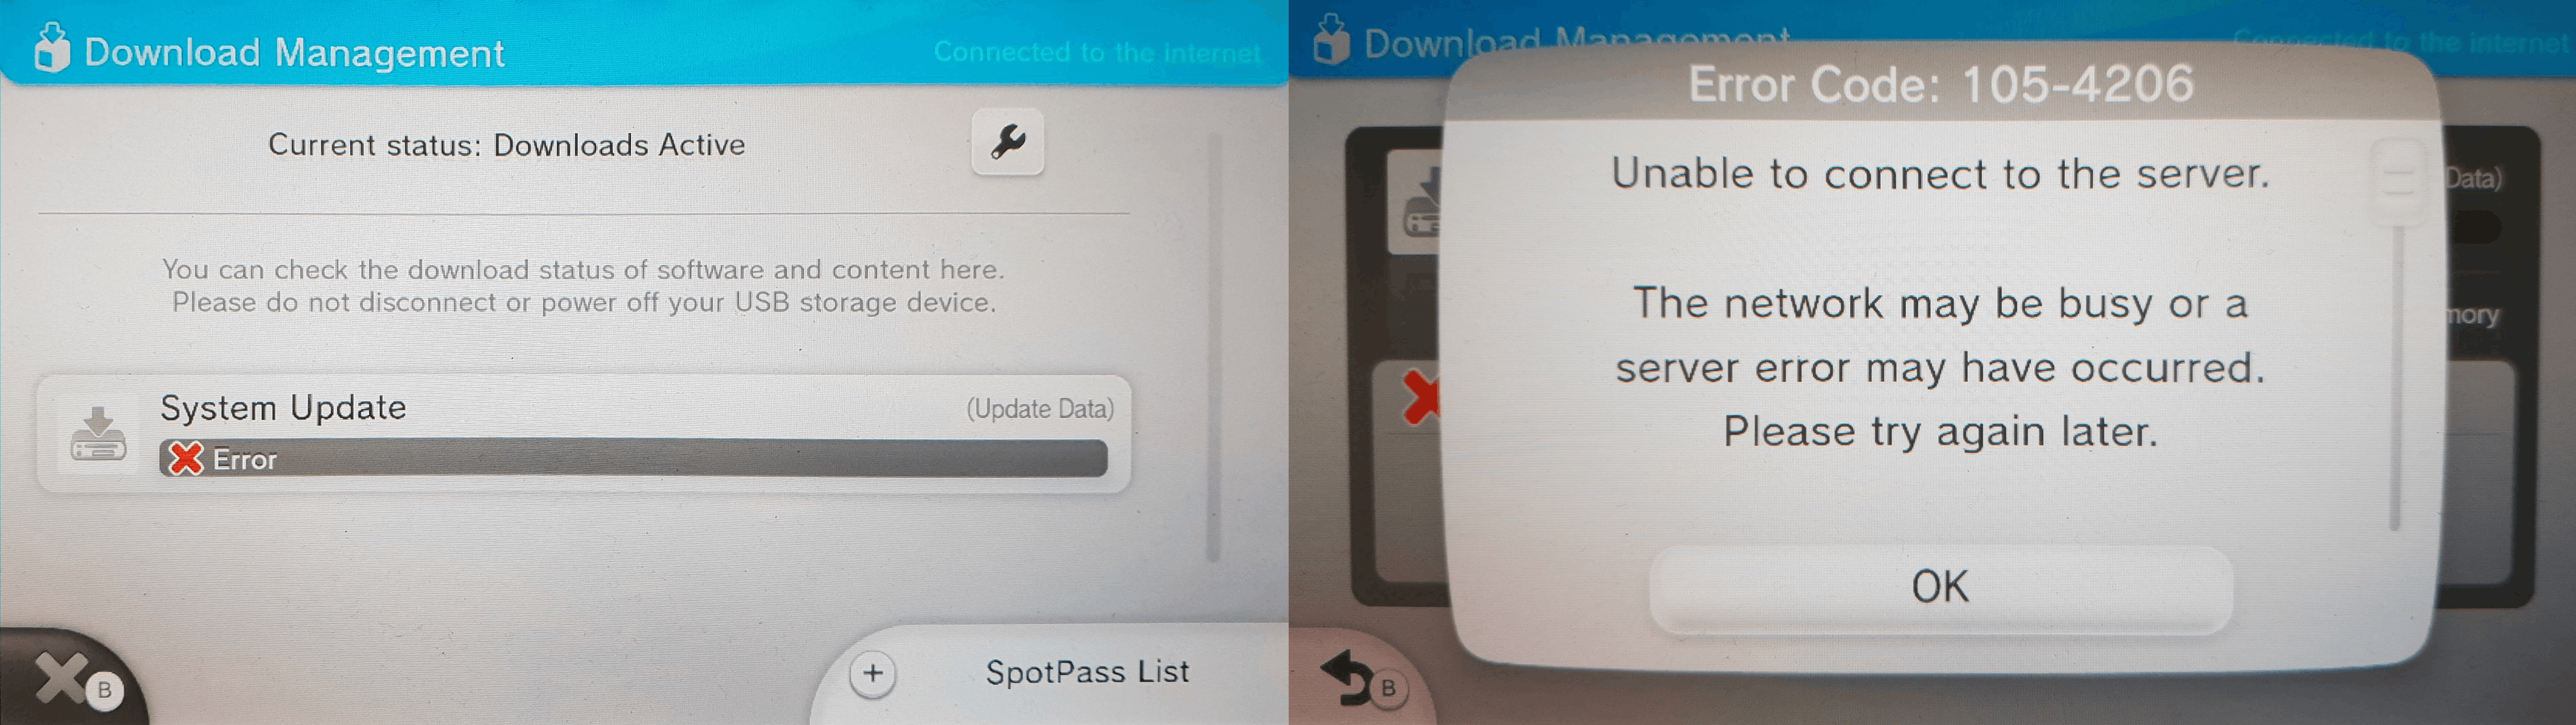
Note that, to access the eShop with these DNS addresses set, you must first run NNU-Patcher through the Homebrew Launcher. Additionally, note that NNU-Patcher is a temporary patch and will need to run again if you need to access the eShop after a reboot.
If the Wii U tries to update you should get an error, which is good!
Add custom ROMS
In this guide, I will not cover how to get the “ROMS”. That is a complicated and long story. But I will tell you how to install them.
First of all place, your ROMS under the install folder in your SD card. Add the SD card to the Wii U and power on.
Run the Haxchi icon (wait for the reboot) then run the Homebrew Launcher. Run and load WUP Installer GX2.
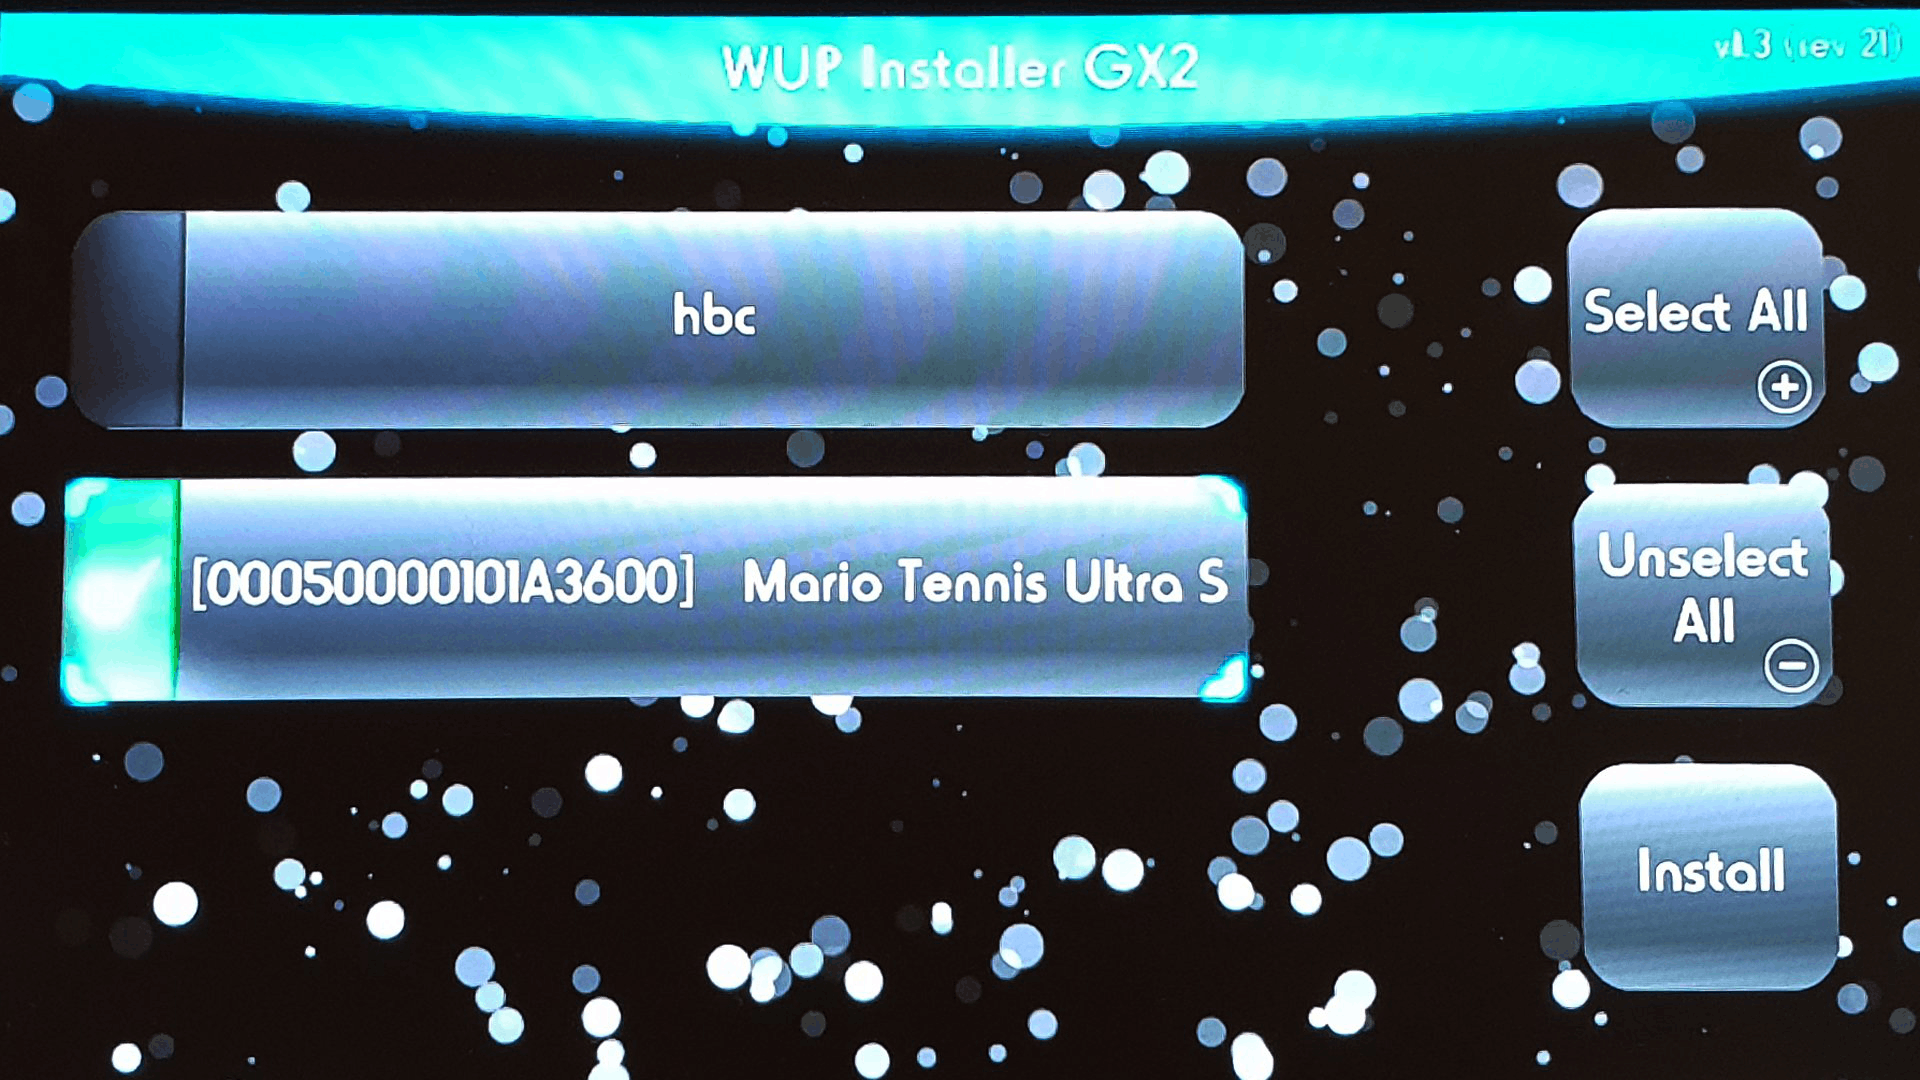
Select the title you want to install and then hit Install. (Note that you can select multiple titles to install also). Hit “Yes” when asked if you are sure you want to install it.
When it asks where you want to install “Nand” means locally on the Wii U storage. This is probably easier and most safe so we will do this here.
Edit: You can actually install titles to a USB stick, but this requires you to reboot the Wii U, plug in a flash drive and format it when prompted. It is not a bad idea though. The Wii U probably have around 20GB of storage space. My 14 titles take about 70 GB…
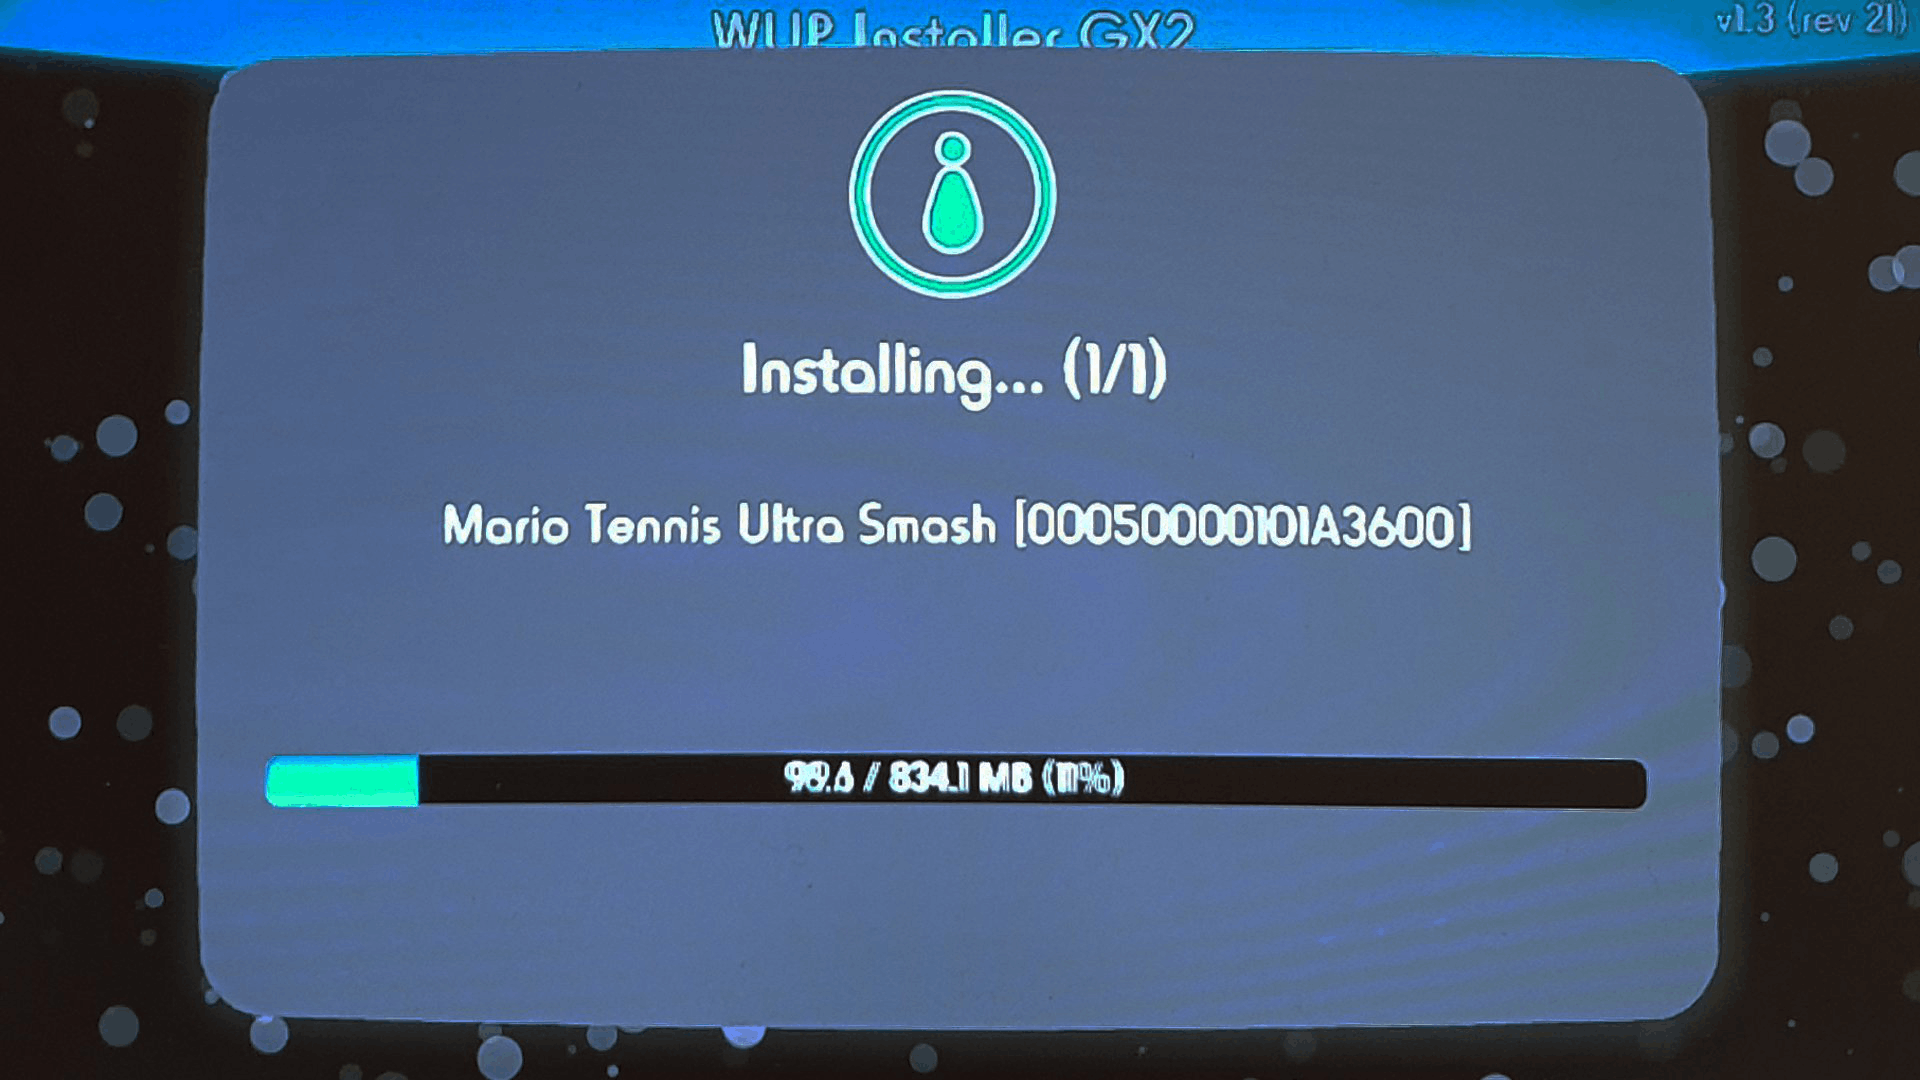
Once the installation is complete hit the Home button to return to the Homebrew Launcher. Hit Home again and then “Close software” -> Close to return to the Wii U main menu.
You should now have your title on the main menu.
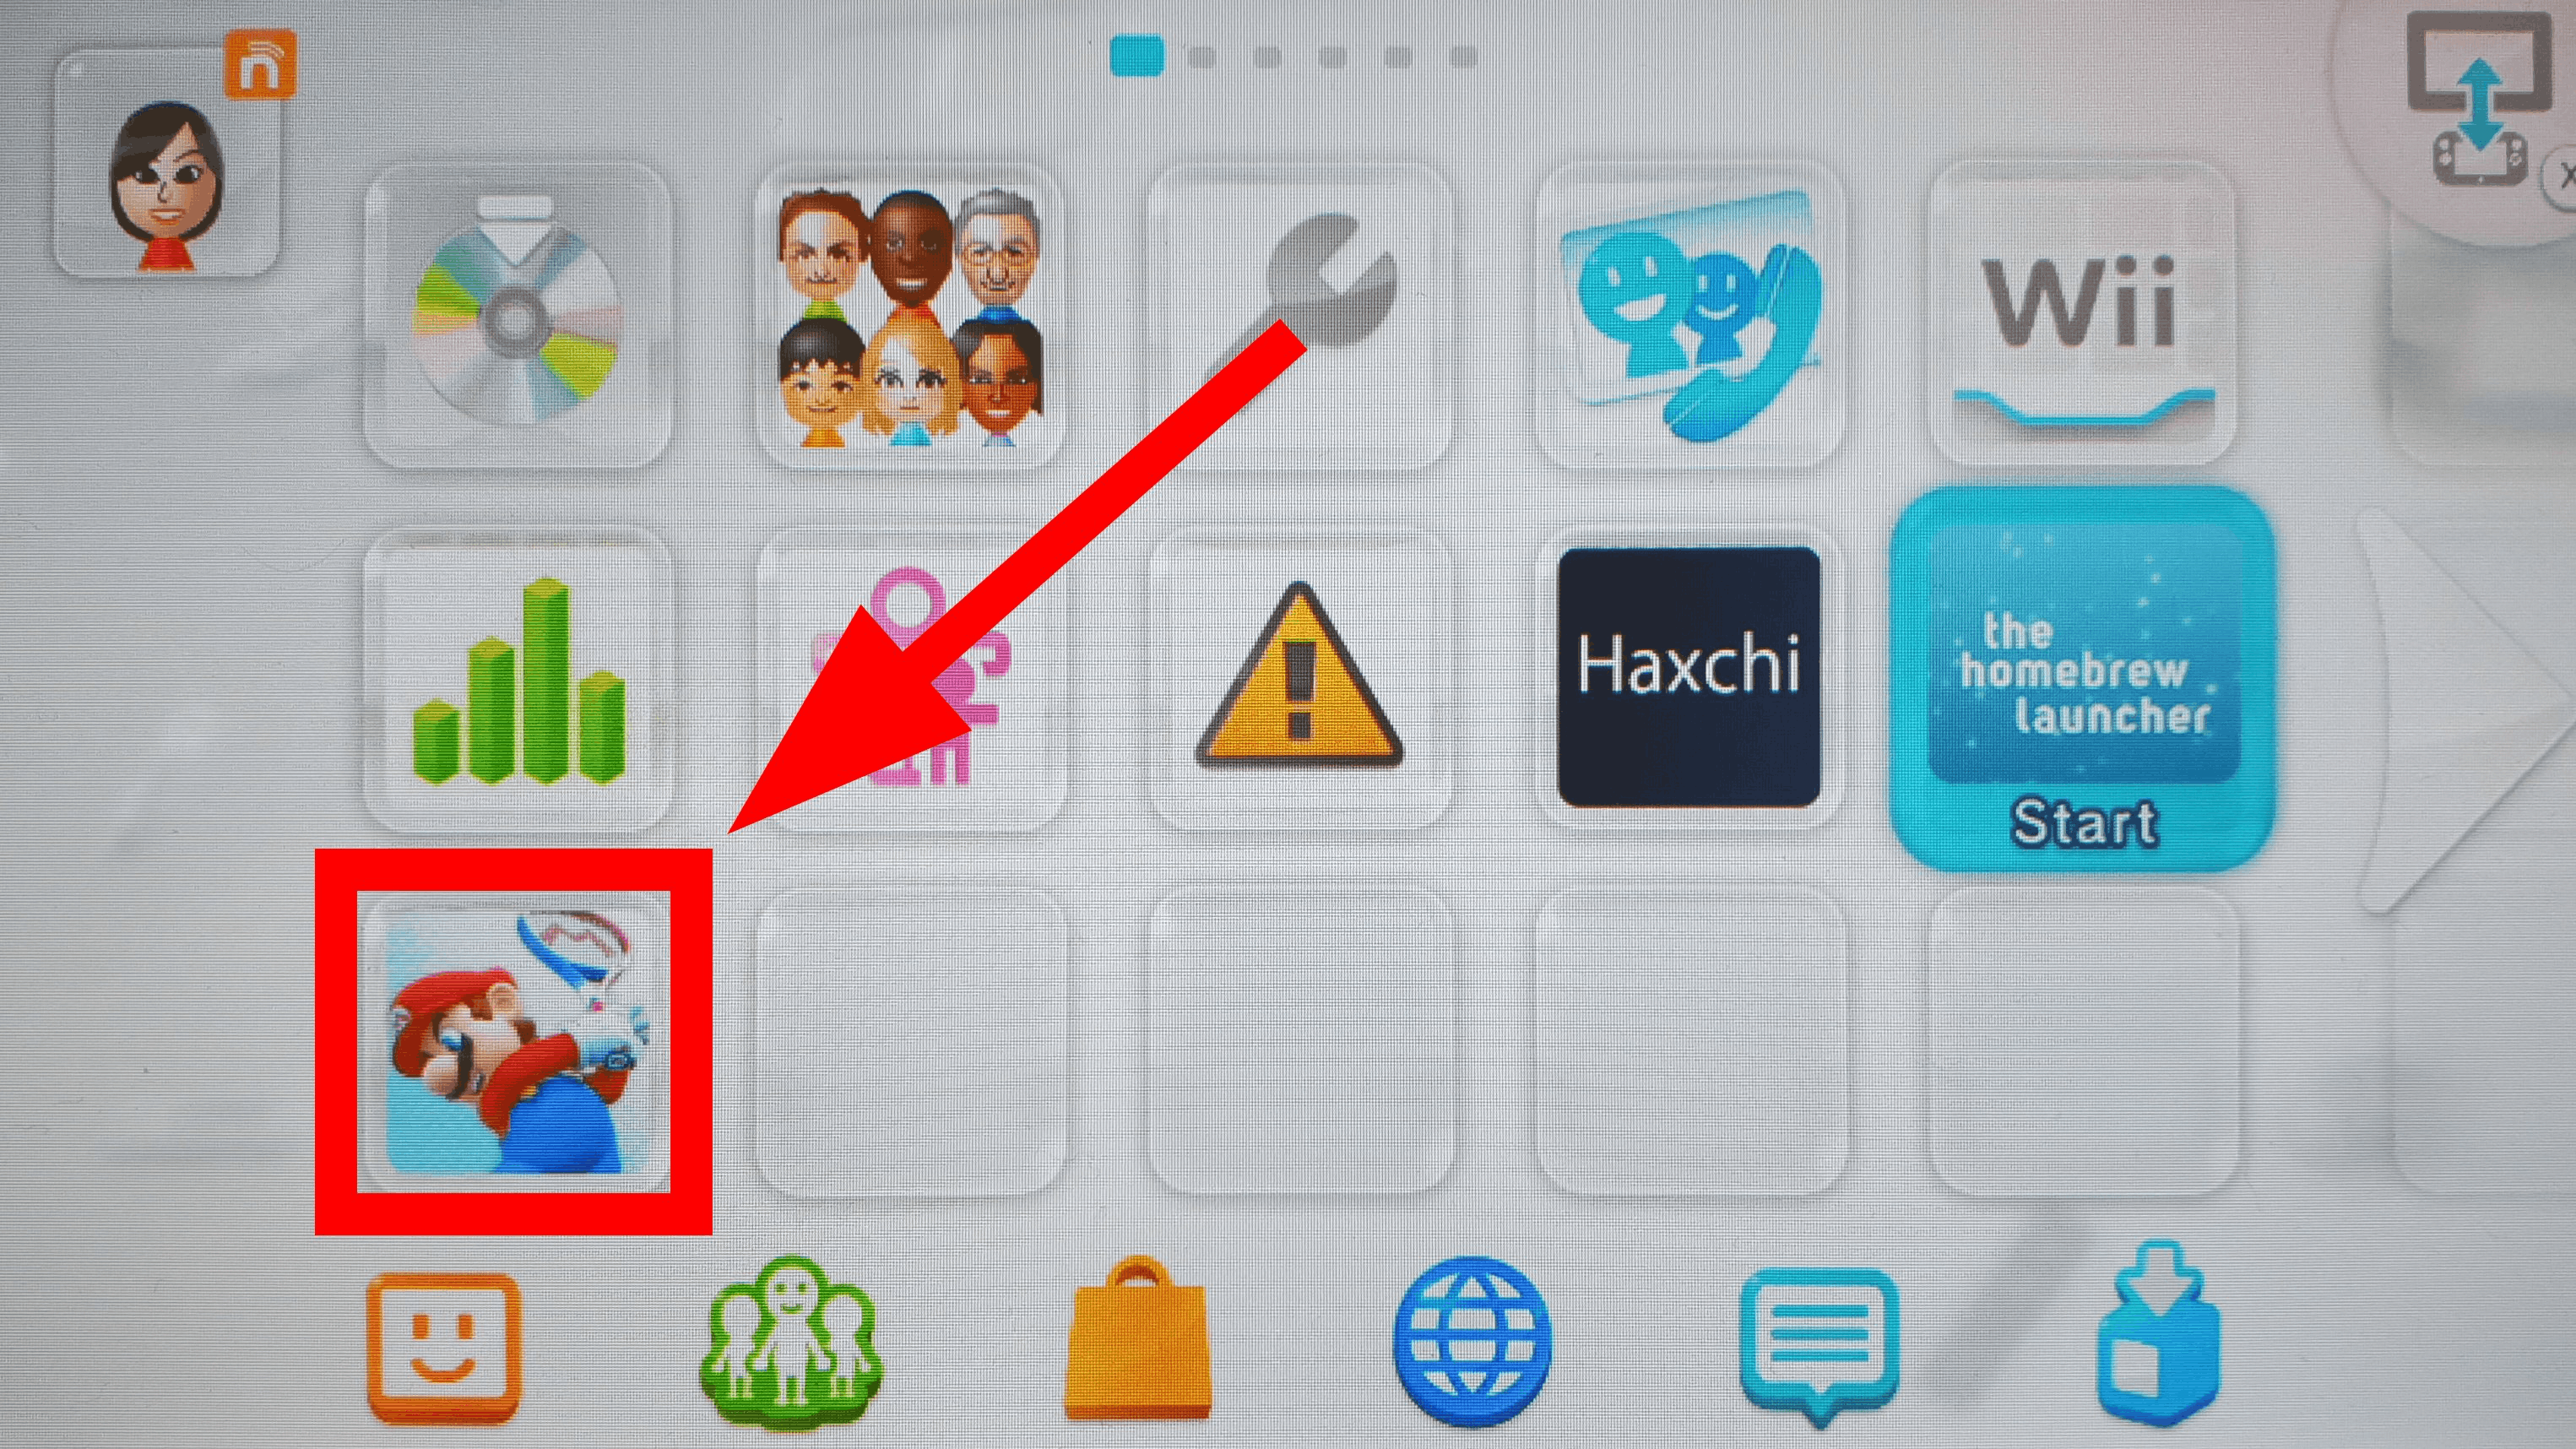
You can now run your custom “title” on the Wii U. You might have to run the Haxchi first though.
Sources:
https://www.reddit.com/r/CemuPiracy/comments/8gj8z8/workaround_download_and_run_wii_u_usb_helper/