
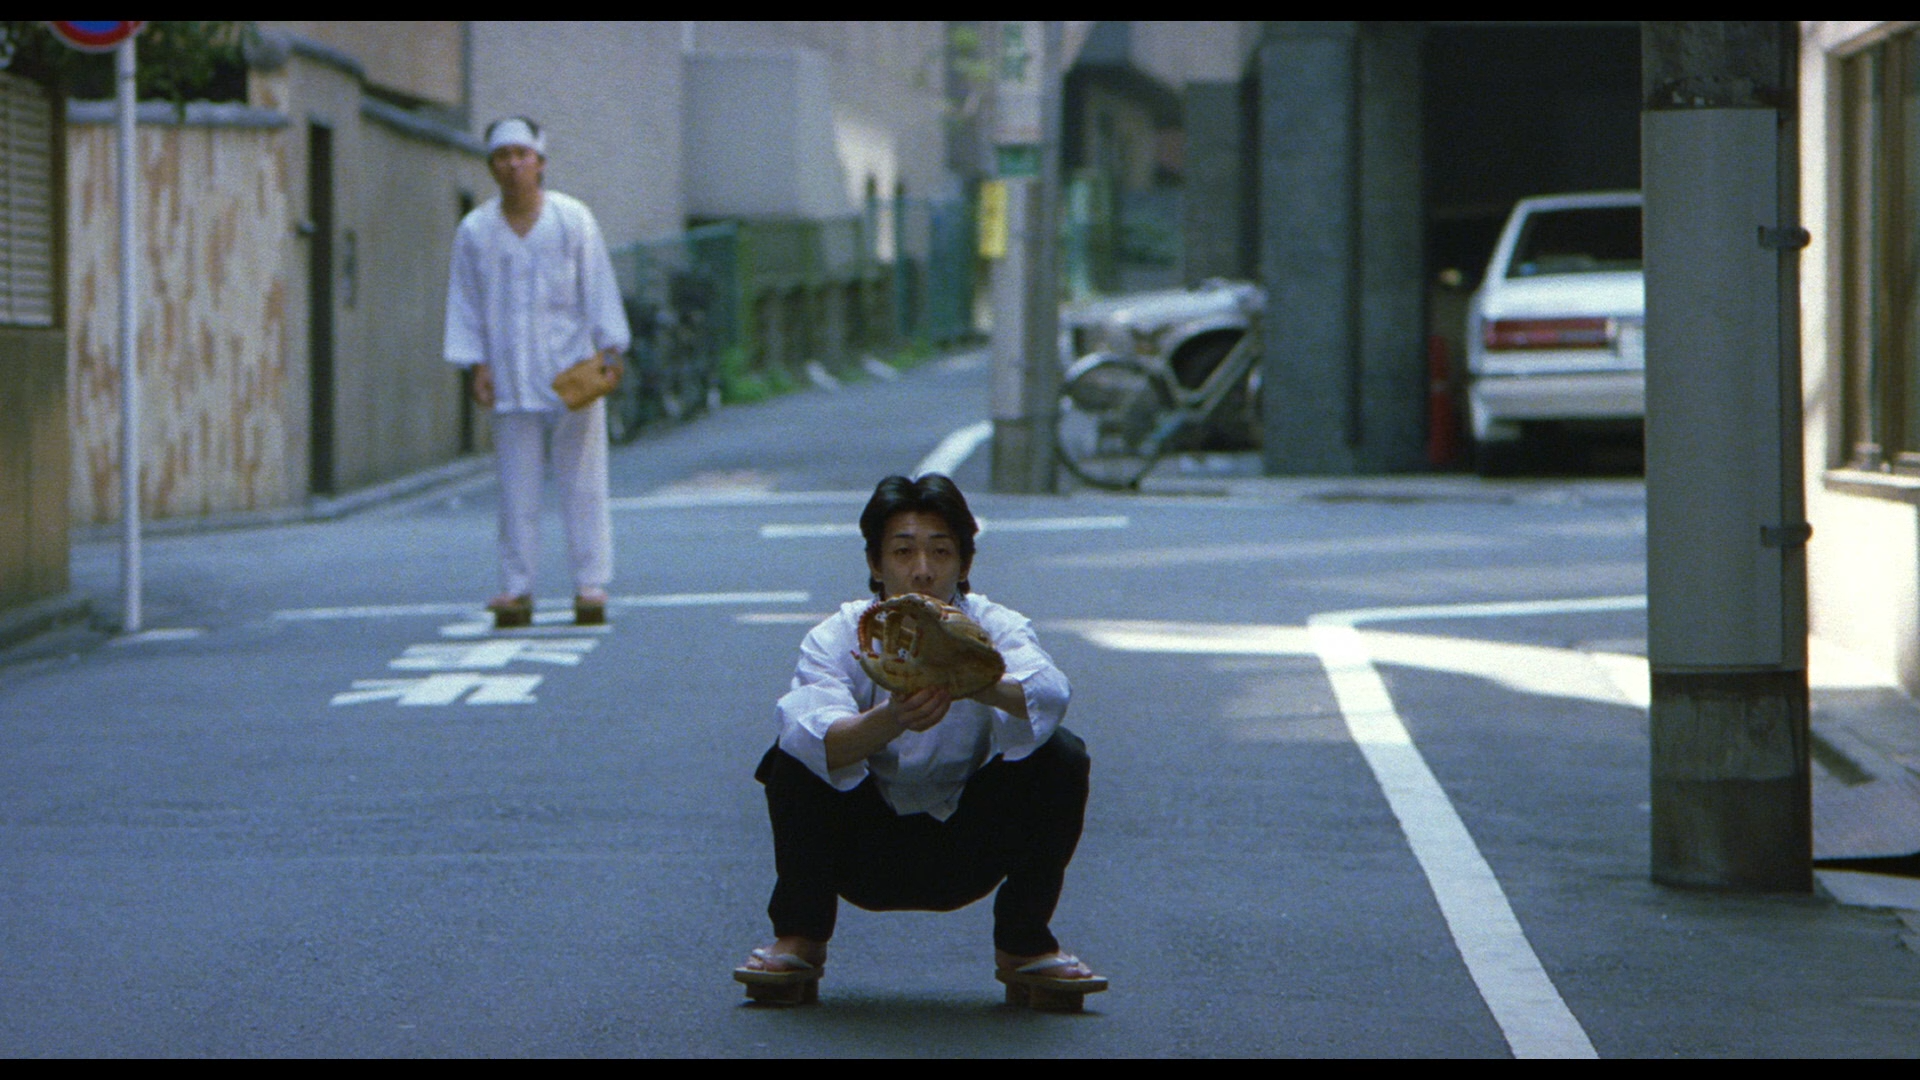
I have some movies initially released in the 90s and later on re-released as Blu-rays. These videos contain a lot of picture noise.
I tried two different ways to reduce noise from the videos. First with the free software Handbrake, then with the paid software Topaz Video Enhance AI.
Here are the results.
Alternative 1:
De-noise with Handbrake
I spent a lot of time with Handbrake to see if I could reduce the noise. I managed to get some acceptable results using the nlmeans filter, but it was quite hard to get a good balance between a sharp image and a noisy image. Note that you can also use these filters with Ffmpeg, if you prefer that.
Since the de-noising made the overall picture a little too smudgy/blurry, I added some sharpness with the LapSharp filter.
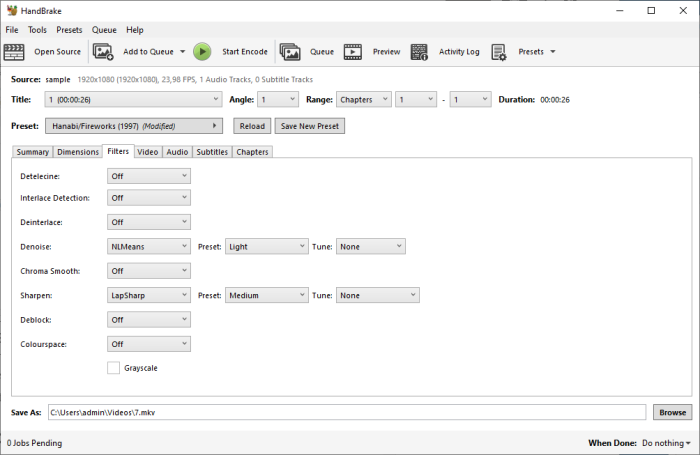
This made the noise less prevalent, but not to the extent I was hoping for.
I also tried to increase the NLMeans filter to “strong”.
Again, the result was a little better, but the noise was still there. It looked more like a low opacity blur filter had been applied on top of the noise reduction filter.
I was not able to produce any better results despite trying different combinations of the LapSharp and NLMeans filter. It might help with advanced command lines to fine-tune the settings but I am not that familiar with the filters.
Alternative 2: De-noise using Topaz Video Enhance AI
Topaz Video Enhance AI is a $200 video processing software for Mac and Windows that can upscale and improve picture quality using AI.
This brings new life to older videos, but at the same time, it can also be destructive if not used reasonably. The filters can sometimes be a bit too much.
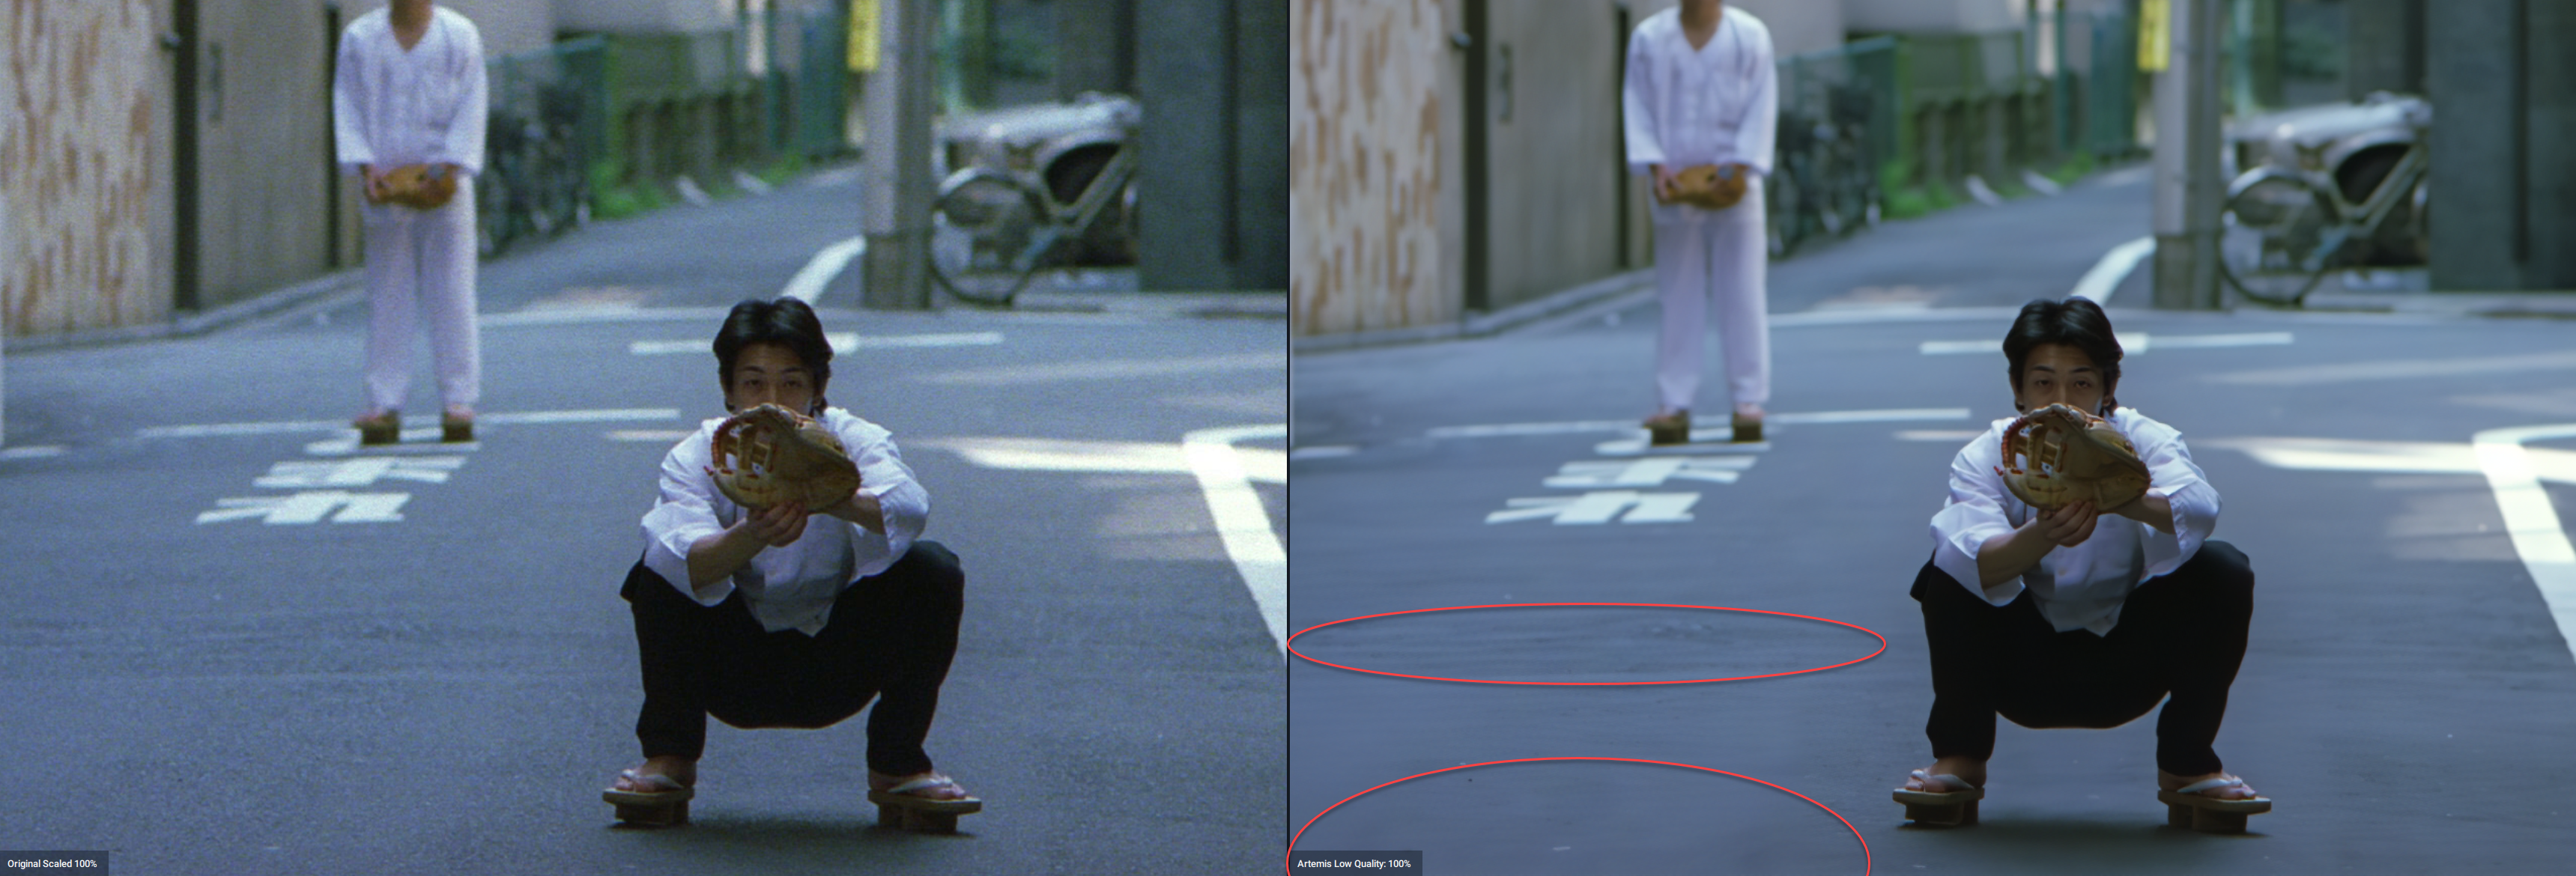
Using version 2.6.1I I first tried to use the built-in preset for reducing noise but this made the video too blurred out. Like in this example:
So I switched from the built-in preset to a custom-made one to find a better compromise in picture quality. Here are the settings I used:
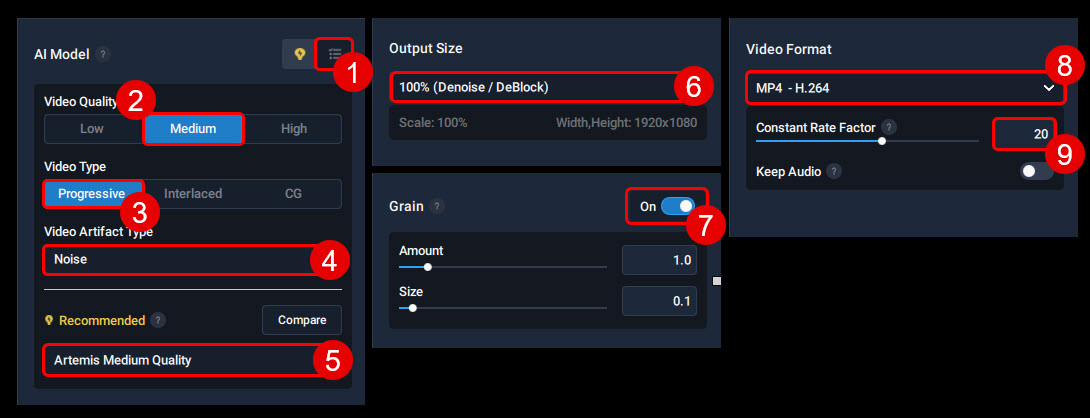
- I switched from “Suggested models” to “All models“.
- I set the video quality to medium because after all, it was a 1080p movie from a Blu-ray. It had a lot of noise but very little compression artifacts.
- I had to find out if the video was interlaced or not. In this case, the video was progressive. Most Blu-rays are.
- I set the “Artifact Type” to “Noise” because I wanted to remove noise from the picture. Unfortunately, one cannot this filter with other processing filters like upscaling…
- I set the AI model set to “Artemis Medium Quality“.
- I set the “Output Size” to 100% Denoise / DeBlock.
I added some grain, but just a tiny bit with the Grain option. This has to be very carefully adjusted to find a subtle setting that makes the picture more natural.I actually ended up not using this as I felt it didn’t add any benefit after all.- I exported the video as an MP4 file with H.264 encoding.
- I set the CRF value to 20. The CRF value determines the quality and file size of the file. 0 is the best quality but produces a large file size and high bitrate. 35 is the worst but will make smaller file sizes and lower bit rates. A 100-minute 1080p movie will take about 11 GB with a CRF of 20. A 100minute 1080p movie will take approximately 100 GB in space if you set the CRF to 0. Make sure you have enough space beforehand.
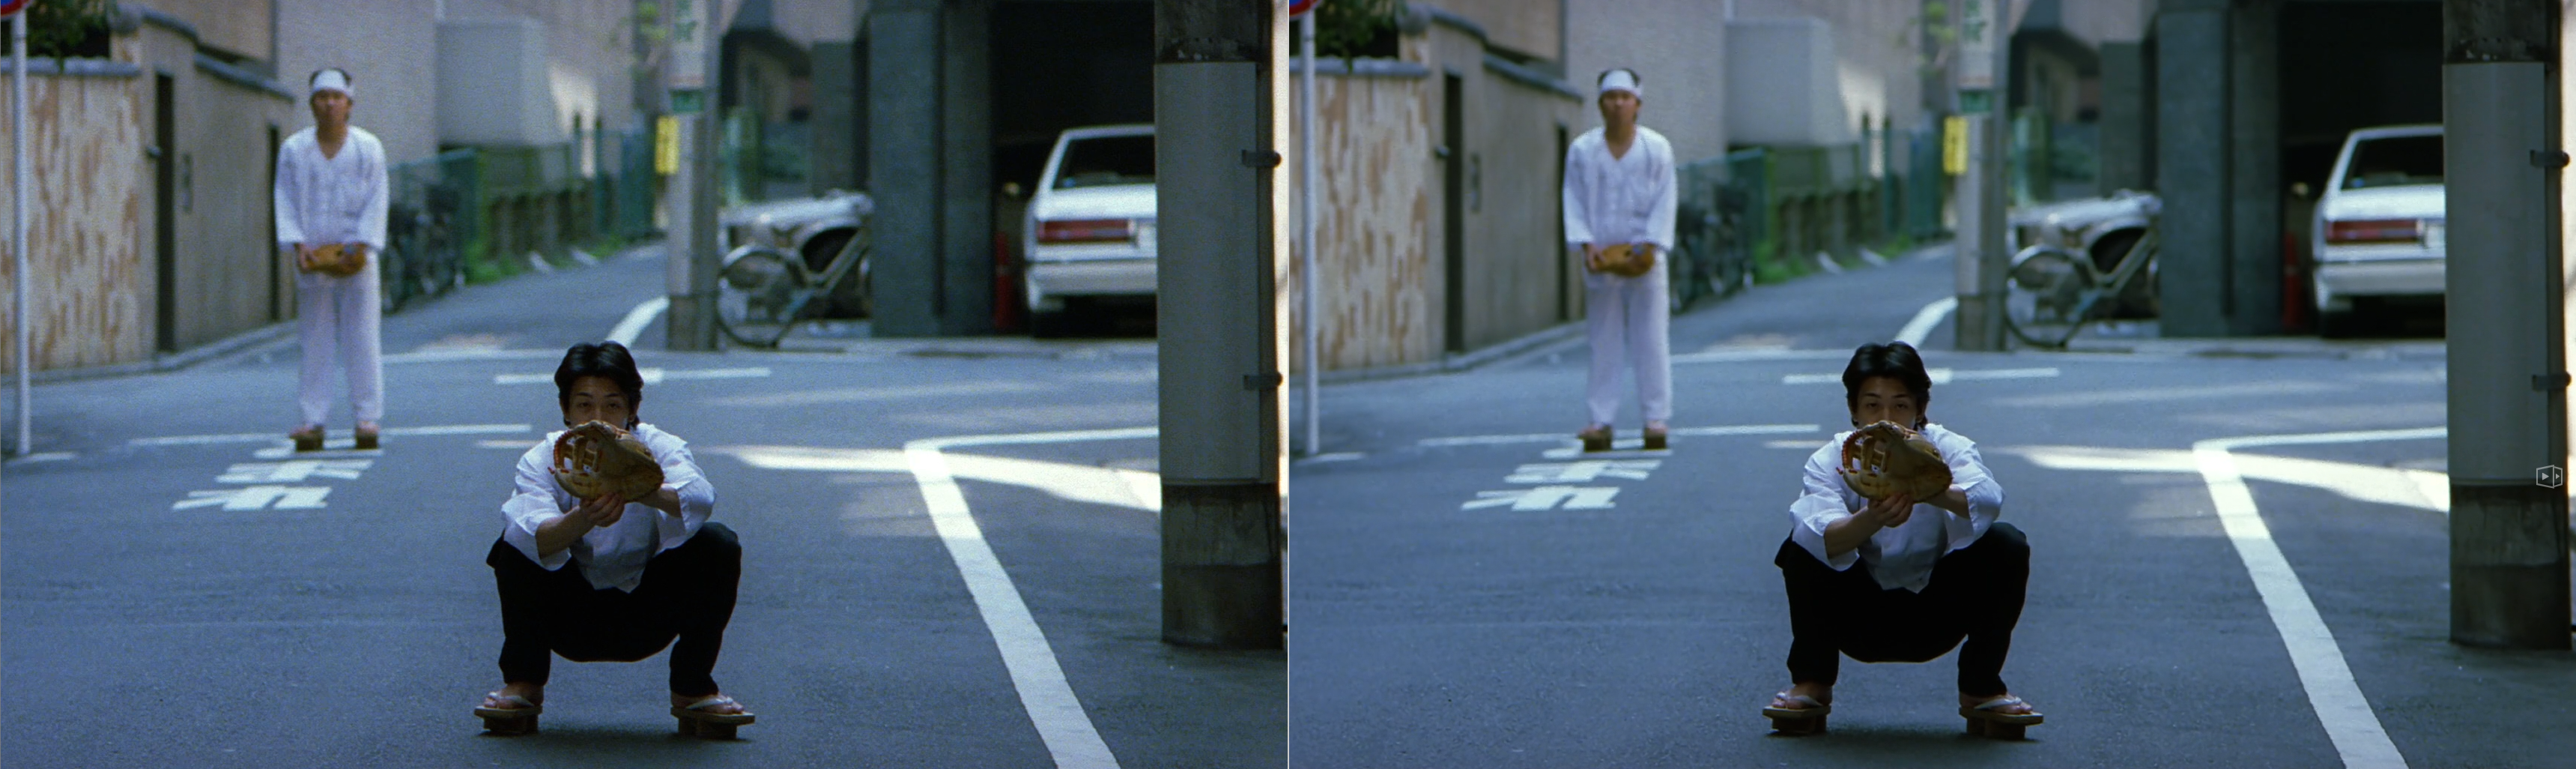
Here is a screenshot of the result. The improved video is to the right. You can see that the video is no longer smudged out or over-blurred as it was with the built-in preset.
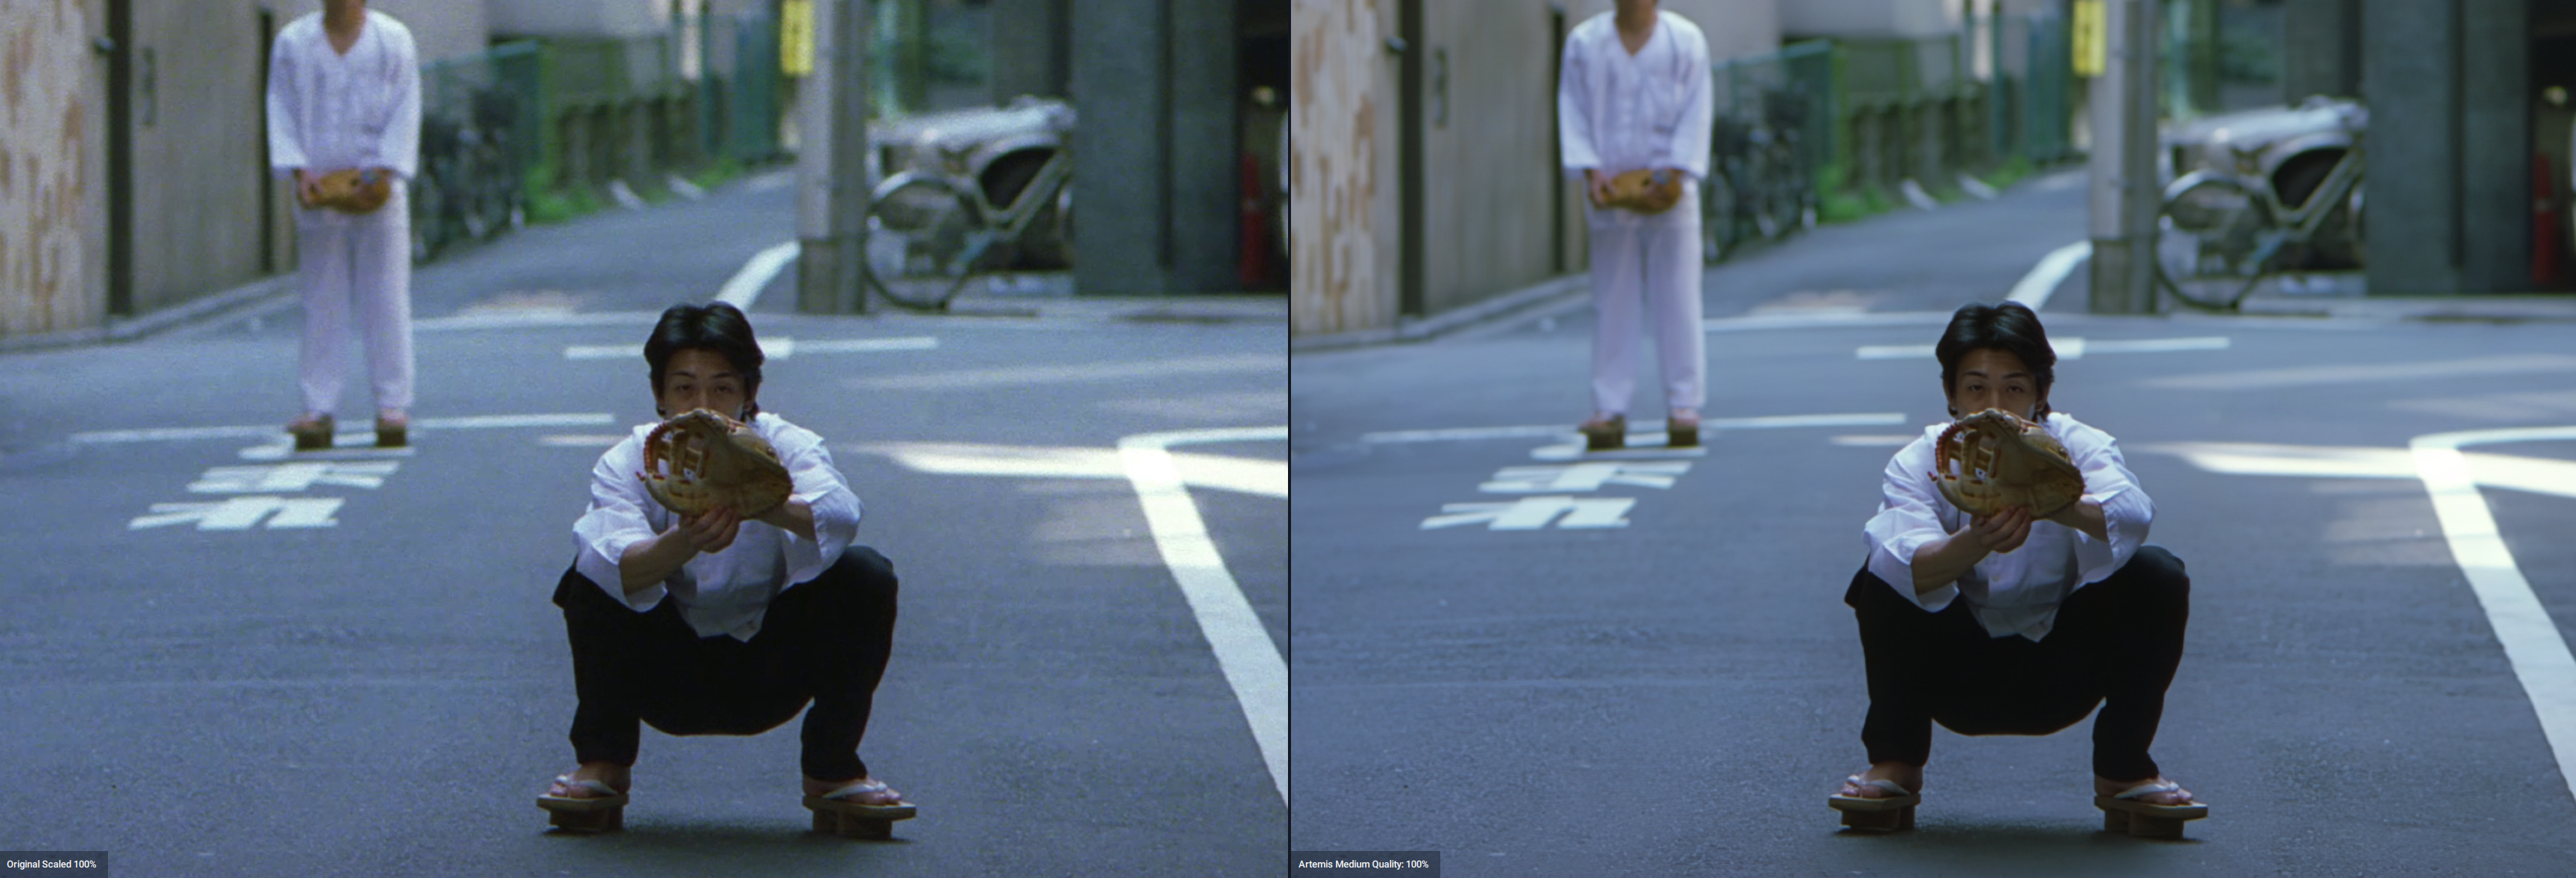
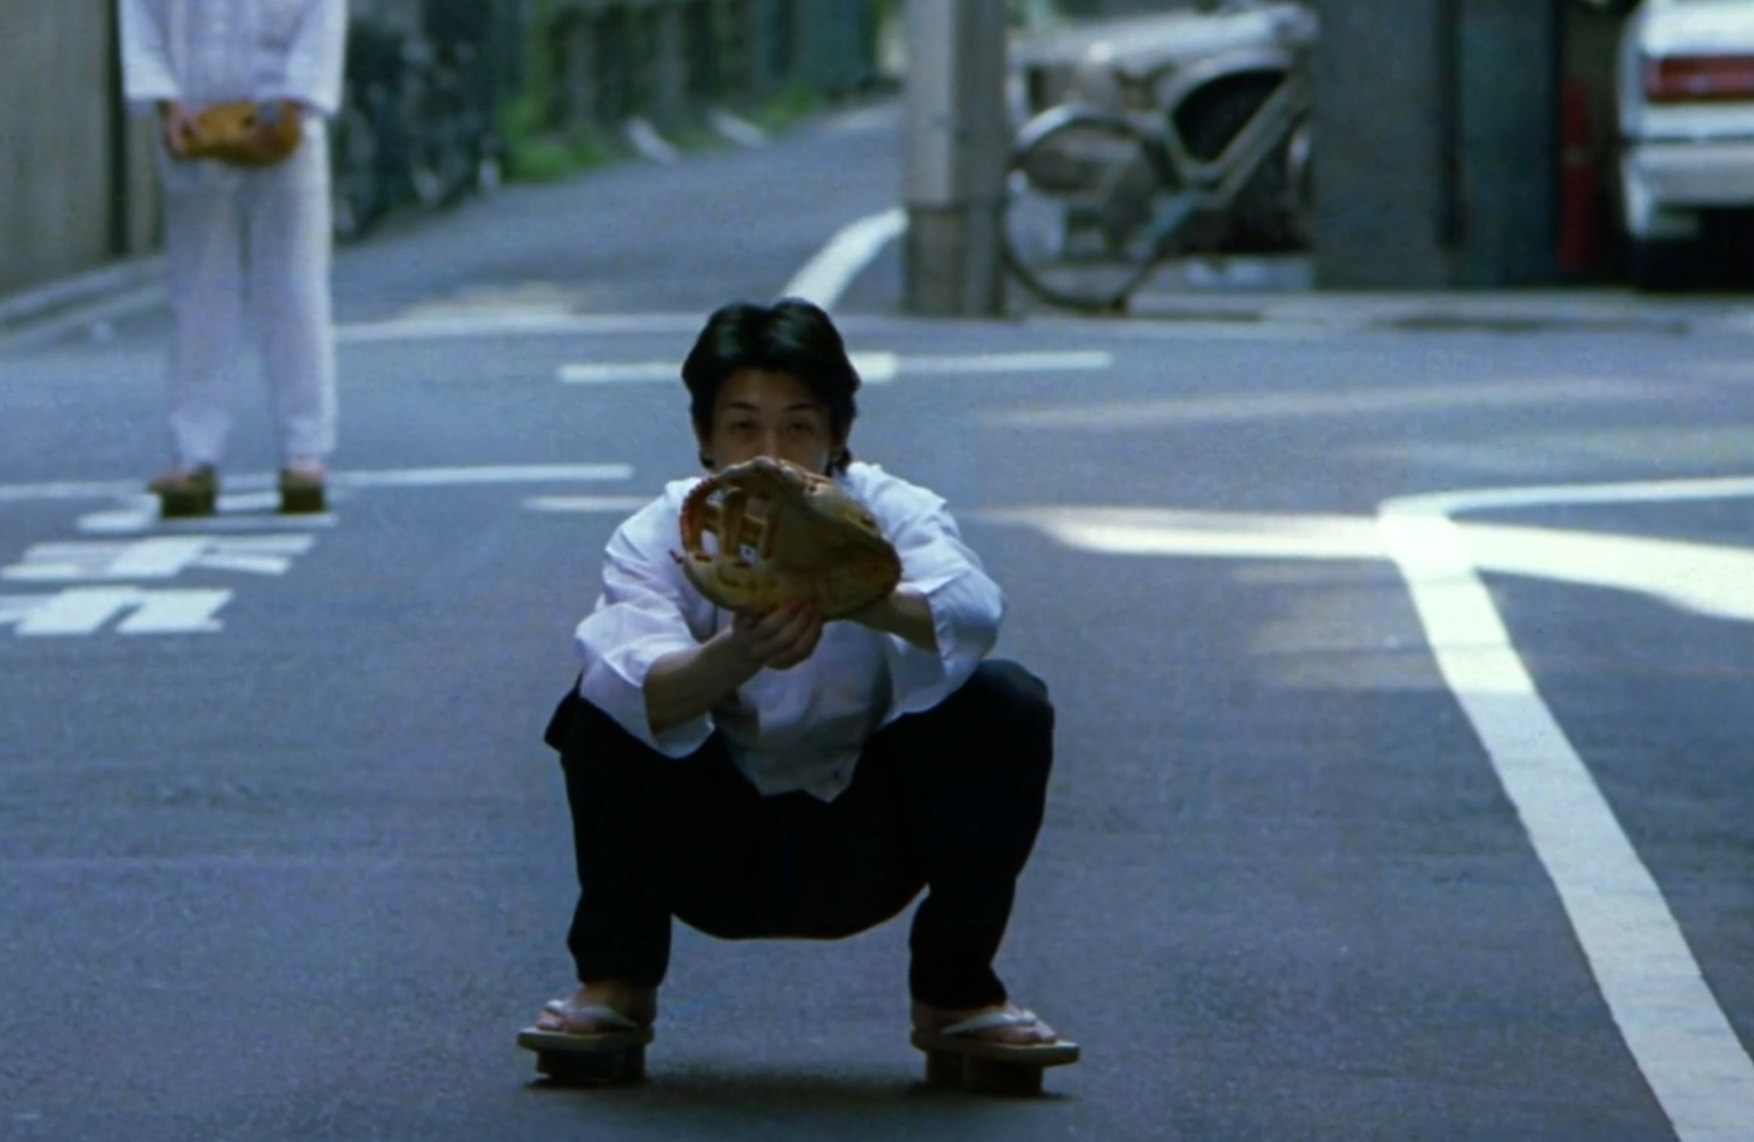
Here is the original video in case you want to see what it looked like before:
And here is the result after de-noising with Topaz Video Enhance AI:
Note: It can be hard to spot the difference if you are viewing the video on a small screen like a mobile phone. The results are more apparent on large screens like TVs.
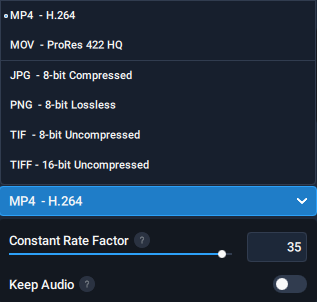
A major disadvantage with Topaz Video Enhance AI is that it has very limited video export options. In fact, the only available video option is MP4 H.264 with a CRF value. I would like to see max rate, buffer rate, and more advanced options.
If you need more advanced encoding settings you will be forced to re-encode the whole video, which will introduce generation loss and reduce the video quality and double the amount of time it takes for the whole process. Not good 😔
⚠ If you plan to re-encode the video after Topaz export I advise to export the video as lossless or uncompressed images. This reduces the quality loss.
What I did was to save the output as PNG lossless files which took about 6 hours to complete with an i9-10920X CPU and consumed 348 GB of space for a 101-minute film with 148388 frames/pictures.
Later I converted all the pictures to a video file using FFmpeg with the following command. Make sure to check that the frame rate -framerate and -r corresponds with the frame rate of the original video, or else you will get audio sync issues.
ffmpeg -framerate 23.976 -i "images\%06d.png" -c:v libx264 -crf 20 -maxrate 8M -bufsize 16M -preset veryslow -tune film -profile:v high -bf 2 -coder 1 -vf format=yuv420p -threads 16 -cpu-used 0 video_output.mkvNote that -framerate comes before the -i this is important!
I intentionally did not include audio during the Topaz conversion. Usually, I will just use MKVToolNix for that later.
Sources and files
Here is the .tlpreset for Topaz Video Enhance AI in case you want to try it.
{
    "authorName": "ScribbleGhost",
    "name": "Removing picture noise from movies from the 90s",
    "modelPanel": 0,
    "modelKey": "amq-13",
    "modelParams":
    {
        "postGrain": 0,
        "postGrainSize": 0.1
    },
    "inputVidQuality": 1,
    "inputVidType": 0,
    "inputVidArtifactType": 1,
    "selectedModelIdxInBasicPanel": 0,
    "procPreset": 1,
    "vscale": 1,
    "outputWidth": 0,
    "outputHeight": 0,
    "fillmode": false,
    "outputVideoFormat": 0,
    "keepAudio": true,
    "customOutputParams":
    {
        "encoderType": 0,
        "bitrate": 0
    },
    "description": "Removing picture noise from movies from the 90s",
    "presetFileVersion": "1"
}
Here are all the sample files if you want to download and compare them yourself.
Here is a comparison between Handbrake using NLMeans and Topaz Video Enhance AI.
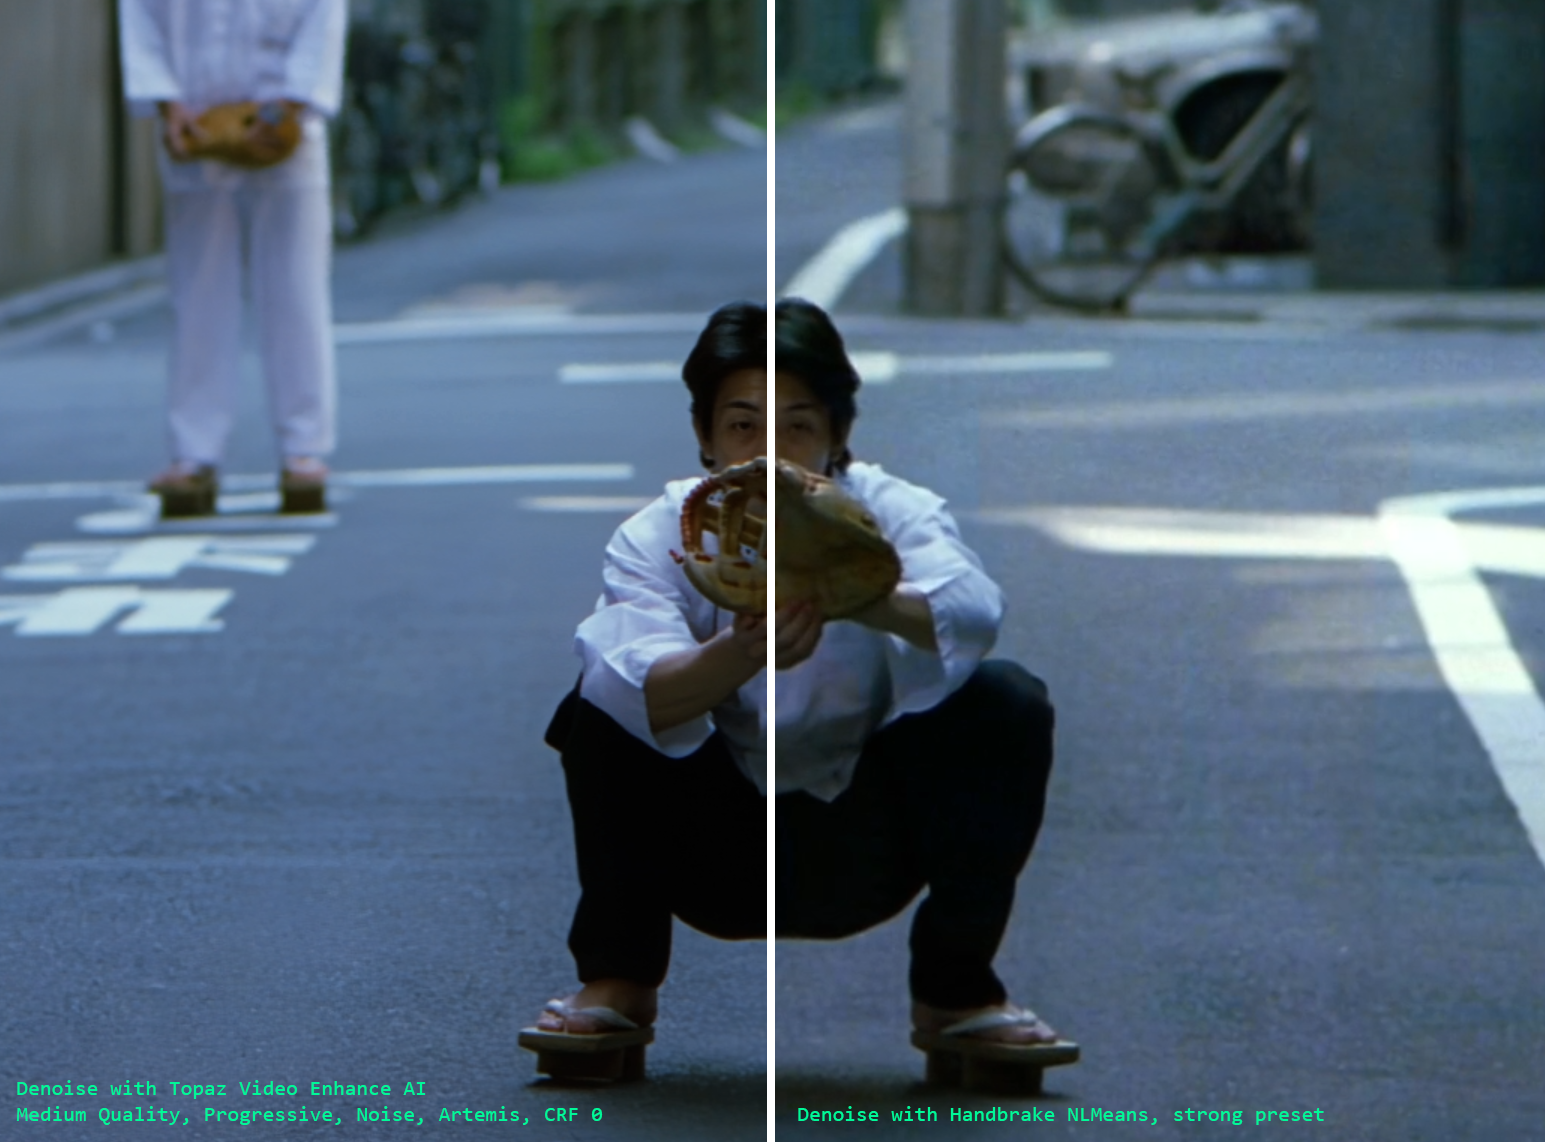
Note the lack of detail in the face with the NLMeans filter to the right. Also, note how the noise on the street in the background is almost completely gone.
I really look forward to experiencing how AI can improve signal processing. At this rate, I am not even sure if it is possible to make it any better.
Let me know if you have tried other tools for de-noising and how it turned out. 😁